



Assembling the front bumper and headlights
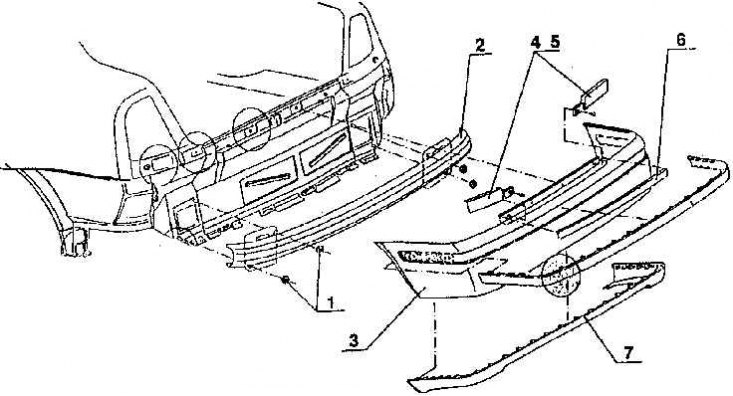
1 – headlight; 2 – bumper; 3 – spoiler; 4 – bumper frame; 5 – temperature sensor; 6 – temperature sensor bracket; 7 – nut
Installing the front bumper and strip
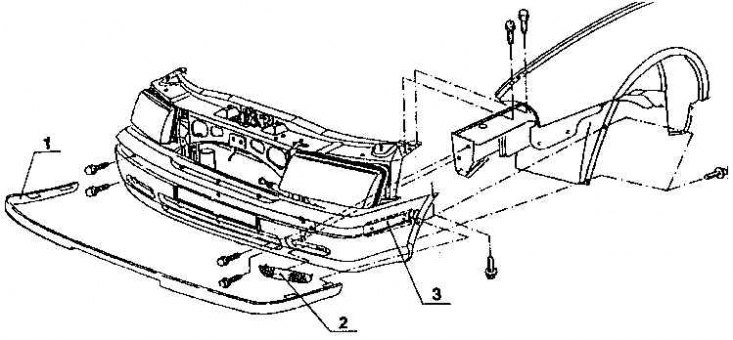
1 – facing strip; 2 – lid; 3 – holder
The front bumper consists of several parts. This includes the frame, welded from steel stampings. There is a gap between the frame and the plastic bumper. The steel frame is attached with two nuts to the bolts welded to the front wall, and then with two more bolt connections together with the front wall to the side members of the car frame (when installing a fully assembled front wall to the body).
The next assembly unit is the bumper itself, made of plastic (EPDM polypropylene with 10% talc). The bumper is the color of the car. The plastic part is already mounted by the manufacturer with a spoiler made of the same material, but black. The spoiler is connected to the bumper only by plastic pins.
This kit is mounted to the front wall with three vertically oriented bolts in the middle of the front top side; the next two bolts are located in shaped holes, which are covered with plastic caps after the assembly of the front wall and body is completed. (Under the right cover is the towing eye of the car). Two more bolts can be accessed through the middle groove in the bumper. In the shaped holes, as well as in the bumper recess (designed for the central black plastic bumper cover) there are two bolts (on each side) for mounting the entire front wall to the body frame.
Side holders are inserted on both sides of the plastic part of the bumper (steel stampings). Bolts are inserted into the holes in the holders, which are used to screw both the bumper and the wing to the body frame. The recess along the entire length of the bumper is closed (as already said) after the assembly of the entire front wall with the body is completed, a narrow bumper cover. This cover is held only by plastic pins.
[Article published on the website: SkodaBook]