
Company vehicles Hyundai Company vehicles Kia Company vehicles Lada Company vehicles Mazda Company vehicles Mercedes-Benz Company vehicles Opel Company vehicles Mitsubishi
English Русский
Български
Беларускі
Український
Српски
Hrvatski
Română
Polski
Slovenský
Magyar
Articles   
Bookmark Contacts Sitemap
SkodaBook.ru


Fabia Rapid Octavia Superb Kodiaq Yeti Others
Octavia 1 (1996-2004) Octavia 3 (2013-2019)

Adjusting the gear shifter (Skoda Octavia 5E)

  • Main
  • Octavia
  • 5E (2013-2019)
  • Transmission
  • Automatic gearbox 0CW
  • Adjusting the gear shifter
0
Caution! Risk of damage to the mechatronics for the dual clutch transmission "J743". Do not press on the actuator of the sensor when adjusting.


Adjust all 4 gear shifters on the rear side of the mechatronics of the DSG gearbox "J743" to the specified position. Specified position: "a" = 25 mm.

Note: Clean the mechatronics mounting surfaces that come into contact with the gearbox housing. Traces of oil on the sealing surface will subsequently lead to "leakage" during diagnostics. The gasket around the perimeter of the mechatronics mounting surface of the DSG "3743" gearbox must be inserted into the groove.
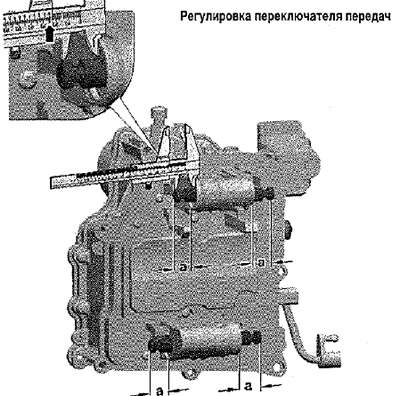

Note: Clean the mechatronics mounting surfaces…


Inspect the primary torque sensor for the gearbox "G182". The clamp must not be damaged.
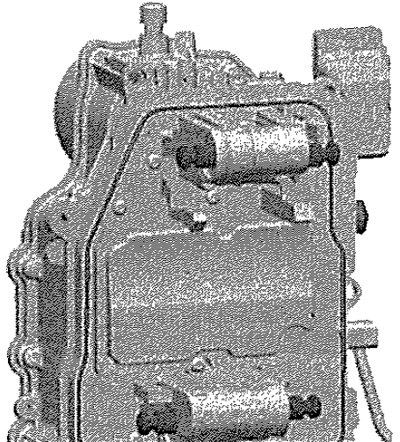
Inspect the primary torque sensor for the gearbox…


Caution! Risk of damage to the friction clutches. When handling and installing the mechatronics, make sure that the gear shift forks are not pushed out of their places. Also watch the engagement lever and the mechatronics pusher. If the release lever presses hard on the mechatronics pusher and moves it, the automatic clutch adjustment mechanism is activated. The automatic clutch adjustment cannot be switched off.


Install mechatronics. Tighten new screws "A" (3 pcs., M8 x 35) and "B" (2 pcs., M8 x 90) by hand crosswise. Remove the guide pins "T10406". Screw in the remaining new screws "B" by hand (2 pcs., M8 x 90). Tighten all screws of the mechatronics for the dual clutch gearbox –J743- to the specified tightening torque in a crosswise pattern.
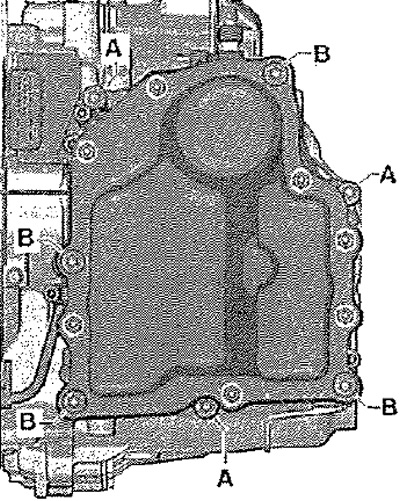
Install mechatronics. Tighten new screws «A» (3…


Make sure that the pusher engages precisely with the engagement lever bearing. Pull the pusher out by hand until it enters the bearing. Now check the position of the pushers again.
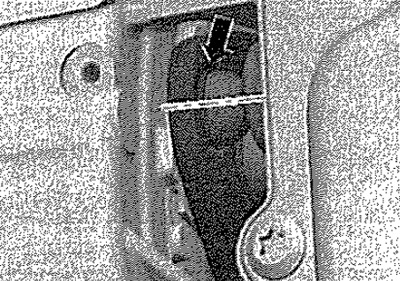
Make sure that the pusher engages precisely with…


Note: Incorrectly installed pushers can damage the mechatronics. To ensure that the pushers are positioned correctly, suitable hooks can be made from wire.


Turn the T10407 mount "slowly and carefully" to the right and remove it.
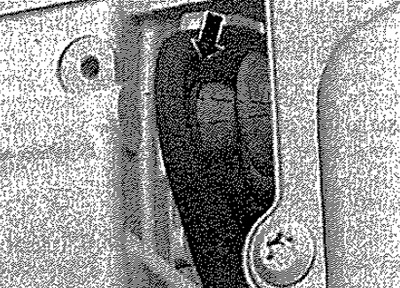


Turn the T10407 mount «slowly and carefully» to…


Both clutch regulators must be correctly fixed in the groove of the clutch engagement lever. At the same time, do not damage the rubber bushings of the clutch regulator. The rubber bushings must fit against the mechatronics. Incorrect installation or damaged rubber bushings lead to oil leakage from the mechatronics. Install the speed sensor at the input of the gearbox "G182" in the "direction of the arrow" on the gearbox housing.
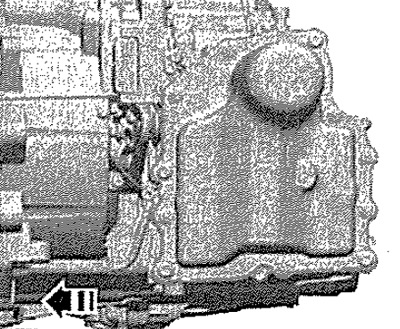
Both clutch regulators must be correctly fixed in…


Note: Check the sensor. The clamp must not be damaged. The sensor with its tongue must lie completely and tightly on the gearbox housing. If the sensor "dangles", the clamp is damaged. Replace the mechatronics.


Remove the plug from the ventilation hole and install the breather. Install the curtain to protect against contamination on the activation lever. Tightening torque of the mounting screws: 8 Nm.


Caution! Never touch the plug-in contacts in the gearbox connector with your hands, so that static discharge does not damage the ECU and mechatronics.


Touch with your hand (without gloves) to ground to remove electrostatic charge. Connect the mechatronics connector and lock it.
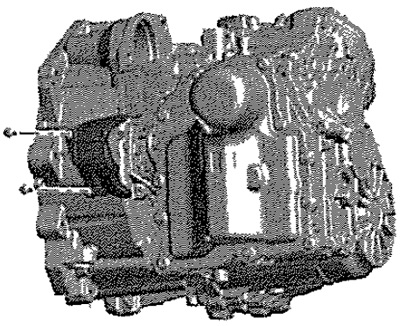
Touch with your hand (without gloves) to ground…


Reinstall all holders and wires on the mechatronics. Install the fan shroud. Install the boost air hose. Install the lower engine soundproof shroud. Fill with transmission oil. Check the selector lever cable adjustment; adjust if necessary. Install the battery and battery bracket. Install the air filter. When disconnecting and connecting the battery ground wire, additional work must be performed. Connect the battery. After installing the mechatronics, it is necessary to perform the -Basic setup-.
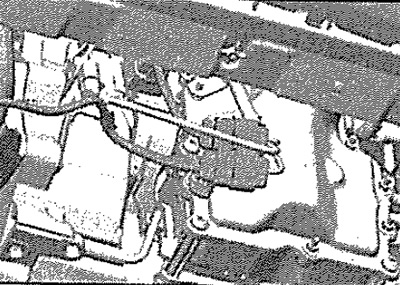
Reinstall all holders and wires on the…
This article is available at russian, bulgarian, belarusian, ukrainian, serbian, croatian, romanian, polish, slovak, hungarian
Article verified: Anatoly Ovchinnikov
Share with friends:
◀ Previous
Skoda Octavia 3: Automatic gearbox 0CW
Next ►

Install mechatronics for dual clutch gearbox «J743» (gearbox installed)
Removal the mechatronics for the dual clutch gearbox «J743» (gearbox…
General installation diagram — mechatronics for dual clutch gearbox «J743»
Safety instructions for mechatronics for dual clutch transmission «J743»
Removal and installation the drive cable
Removal the CP
Installation of the control unit
Transmission oil
Removal and installation the parking lock cover
Removal and installation the parking blocker
Read similar articles on other Skoda models

➧ Adjusting the gear shift drive Skoda Fabia 1 (1999-2007)
➧ Manual Air Conditioner — Adjusting the Unit Skoda Rapid 1 (2012-2022)
➧ Adjusting the rear view mirrors Skoda Superb 2 (2008-2015)
➧ Adjusting the gear shift mechanism Skoda Kodiaq 1 (2016-2024)
➧ Checking and adjusting the timing phases (setting TDC) Skoda Yeti (2009-2017)
➧ Adjusting valve clearance Skoda Favorit (1987-1994)
Link to this article in various formats
Reviews and comments of visitors
No comments yet


Add two numbers: 34 + 41


Octavia 3 (2013-2019) 
  • General information
  • User manual
  • Car driving
  • Maintenance
  • Petrol engines 1.2 l
  • Engine repair
  • Cooling system
  • Supply system
  • Petrol engines 1.4 l
  • Engine repair
  • Supply system
  • Petrol engines 1.8/2.0 l
  • Engine repair
  • Cooling system
  • Supply system
  • Diesel engines 1.6/2.0 l
  • Engine repair
  • Cooling system
  • Supply system
  • Transmission
  • Mechanical gearbox 02S
  • Automatic gearbox 0CW
  • Automatic gearbox 0D9
  • Chassis (running gear)
  • Front suspension
  • Rear suspension
  • Brake system
  • Steering
  • Body and interior
  • Doors, locks and windows
  • Exterior (external elements)
  • Interior (internal elements)
  • Ventilation and air conditioning
  • Electrical equipment
  • Equipment and devices
  • Headlights and lighting
  • Wiring diagrams (basic)
  • Wiring diagrams (comfort)
Octavia 1 (1996-2004) 
  • General information
  • Vehicle details
  • Maintenance
  • Power unit
  • Petrol engines 1.6 l AEE
  • Petrol engines 1.8 l AGN
  • Diesel engines 1.9 l AGR
  • Fuel system
  • Exhaust system
  • Cooling system
  • Transmission
  • Clutch
  • Car gearbox
  • Gearbox repair 02J
  • Gearbox repair 02K
  • Chassis (running gear)
  • Wheels and tires
  • Suspension and axles
  • Brake system
  • Body and interior
  • Exterior (external elements)
  • Interior (internal elements)
  • Doors, locks and windows
  • Electrical equipment
  • Equipment and devices
  • Electrical circuits
SkodaBook.ru © 2018–2026 | Mobile version | Articles on Skoda | Sitemap EN BG BY UA RS HR RO PL SK HU | Feedback | Site search | Bookmark
Fabia 1 (1999-2007) | Fabia 2 (2007-2014) | Rapid 1 (2012-2022) | Octavia 1 (1996-2004) | Octavia 3 (2013-2019) | Superb 2 (2008-2015) | Kodiaq 1 (2016-2024) | Yeti (2009-2017) | Favorit (1987-1994) | Felicia (1994-2001) |
By continuing to use the site, you agree to the use of cookies.