



Contents: Troubleshooting ⬇ Bulkhead ⬇
Troubleshooting
1. Carburetor problems are usually caused by dirt getting into the float chamber and clogging the jets, which leads to a weakened mixture or loss of power in a certain range of engine speeds. In this case, the problem is solved by a complete cleaning. If the carburetor is badly worn, unstable engine operation may be observed, which is caused by air getting through the throttle shaft bearings.
Bulkhead
2. Although some of the work can be done with the carburetor installed, the following steps describe cleaning and adjustment procedures that are performed after the carburetor has been removed from the intake manifold. If the carburetor is worn or damaged, it must be replaced or rebuilt, and this should be done by a professional.
3. Note the location and direction of the throttle valve vacuum hoses and disconnect them.
4. Remove the four mounting screws and lift the top of the carburetor off the bottom.
5. Remove any remaining fuel from the float chamber. Inspect the float chamber for corrosion, sediment or carbon deposits.
6. Knock out the pivot pin and remove the float, then remove the float regulator needle. Shake the float to make sure there is no fuel in it, and also check the condition of the pivot pin. Carefully check the condition of the float regulator needle to make sure the anti-vibration ball moves freely and the tip of the needle is not worn out.
7. Remove the fuel filter from the inlet channel. This filter must be replaced.
8. Loosen the mixture adjustment screw and inspect its tip for damage or wear.
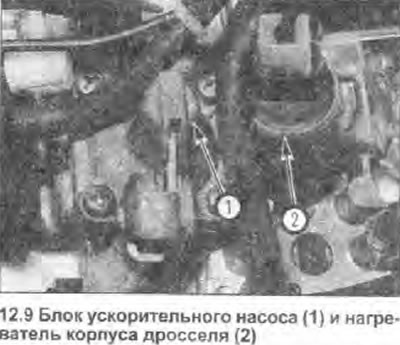
9. Unscrew the four mounting screws and remove the accelerator pump unit. Check the condition of the diaphragm (see illustration).
10. Using a screwdriver as a lever; carefully remove the accelerator pump jet from its housing. Then shake it, you should be able to hear the ball inside move. If the ball does not move, it is jammed and the jet needs to be replaced.
11. Note the locations, then remove the primary idle jet assembly and both main jets.
Note: The remaining jets or emulsion tubes cannot be removed. Make sure the passages from the float chamber to the emulsion tubes are not clogged.
12. Unscrew the two mounting screws and remove the economizer valve block. Check the operation of the diaphragm and inspect it for signs of damage.
13. Check the condition of the secondary throttle body vacuum hose. If equipped, connect a vacuum pump to the hose and operate it until the diaphragm activates. If the diaphragm does not operate, or if it does not hold vacuum for at least 10 seconds, replace it.
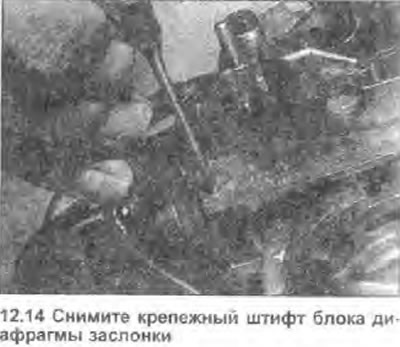
14. To remove the diaphragm assembly, remove the pin securing the assembly to the upper housing (see illustration), unscrew the three mounting screws and remove the damper housing. The pull-out diaphragm can be removed by removing the star-shaped mounting bracket.
15. Clean the carburetor parts, internal passages, float chamber, jets and other components in clean petrol, and blow everything out with compressed air. Although the throttle housing cover can be removed for inspection, installation of the throttle and fast idle screw is best left to a Skoda dealer or specialist, as this requires special equipment.
Note: Do not apply compressed air to the passages unless the diaphragm is removed, this will most likely cause damage.
16. Prepare new gaskets for assembly. If the diaphragm block and housing were removed, use a new roll pin and star clip to secure them during installation. Replace all components including vacuum hoses, rods and other connections that are in question.
17. Before assembly, make sure that all contact surfaces, jets and channels are completely clean.
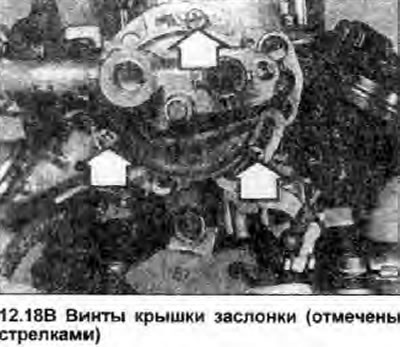
18. Assembly is carried out in reverse order, taking into account the following points (see illustrations).
 |
 |
- a) Make sure the main jets are positioned correctly.
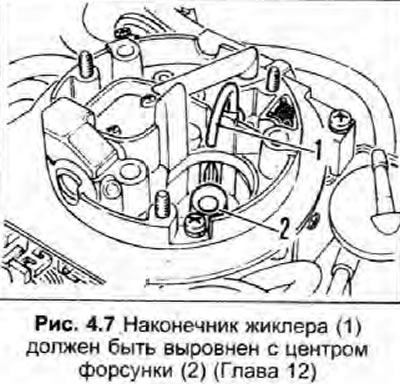
- b) The seal on the pump nozzle must be replaced. The nozzle tip must be centered as indicated (see Fig. 4.7). The tip should protrude 22-24 mm above the top edge of the diffuser.
- c) When setting the mixture screw, replace the small seal, then insert the screw and tighten it by hand until it stops, then from this position, back off the screw three full turns. This will give a rough setting for starting the engine.
- d) The float adjuster needle should be installed so that the ball faces outwards. The top of the float adjuster needle should fit into the groove in the adjustment.
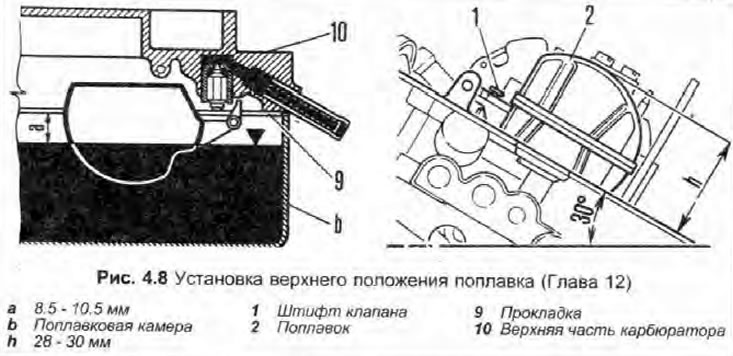
- e) Before installing the upper part of the carburetor, check the height of the float. To do this, hold the upper housing at an angle of 30°, and in the position where the tongue of the float just touches the ball of the fully closed needle, check that the distance between the upper housing and the upper part of the float corresponds to the data given in Specifications (see Fig. 4.8).
- f) Where this is not correct, check that the needle is positioned correctly. The plastic float cannot be adjusted in any way. If the float height is incorrect, the float and/or needle must be replaced.
- g) If the damper housing cover has been removed, align the mark on the cover with the corresponding mark on the upper housing before reinstalling it. Tighten the three mounting screws.
(Source of the article web resource: «www.SKODABOOK.ru»)
19. Install the carburetor, then check the idle speed and mixture as described in Section 1.