
Note. When assembling, you will need a new nut of the lower mounting bolt.
Removing
1. To gain access to the upper support of the rear suspension strut on Hatchback models, release from the latches and remove the upholstery side panel from the corresponding side of the luggage compartment.
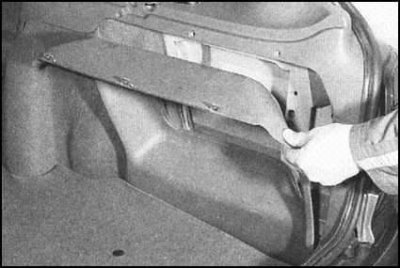
2. On Wagon models, remove the decorative cover of the side upholstery panel from the corresponding side of the luggage compartment, then give the upper and lower panel fixing screws. Unclip and fold back the carpet.
3. On all models, chock the front wheels, then jack up the rear of the vehicle and place it on jack stands. Remove the corresponding rear wheel.
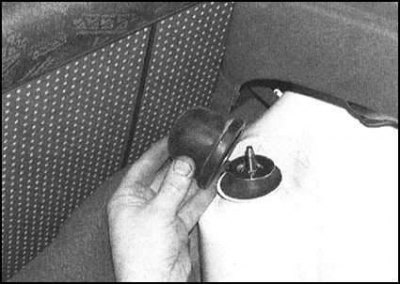
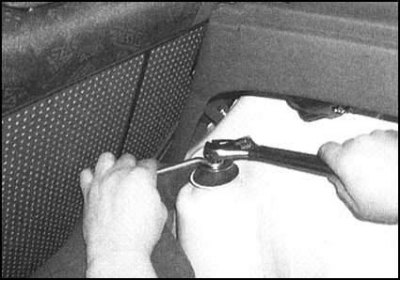
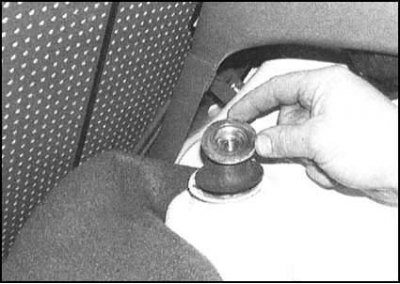
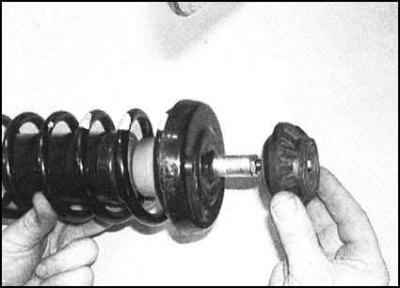
4. In a luggage compartment remove a protective cap of the top support of a rack of a suspension bracket, then give a fixing nut and remove a washer. Trying to remember the installation position of each of the components, remove the Belleville washer, support rubber pad, ring and spacer bushings.
 |  |
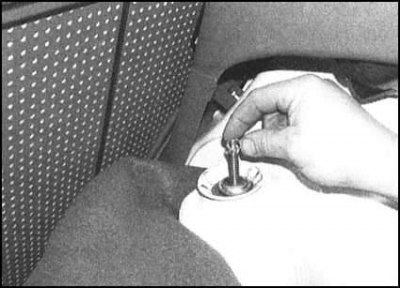 | 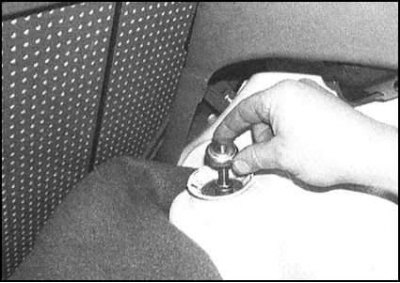 |
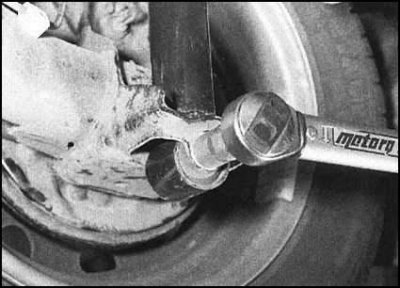
5. From under the car give a nut and take a bolt of the bottom support of a rack. Remove the stand.
Note. During assembly, the nut of the mounting bolt must be replaced without fail. Check the top support rubber pad for signs of material aging and mechanical damage. Replace if necessary.
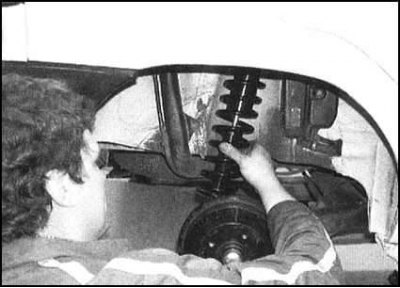 |  |
Installation
1. Get the rack to its regular place, making sure its location relative to the body elements. Insert the through bolt of the lower support, screw on the nut, tightening only by hand so far.
2. In the luggage compartment, install the distance and ring bushings on the rack, then the rubber cushion and the Belleville washer.
3. Install the washer, screw on the top fixing nut and tighten it to the required torque. Install the protective cap of the upper pillar support, then replace the decorative panel of the side upholstery of the luggage compartment.
4. Replace the wheel, then lower the vehicle to the ground and tighten the wheel bolts to specification. Rock the vehicle to seat the strut components, then tighten the strut lower mount bolt nut to the required torque.