
Rear shock absorber
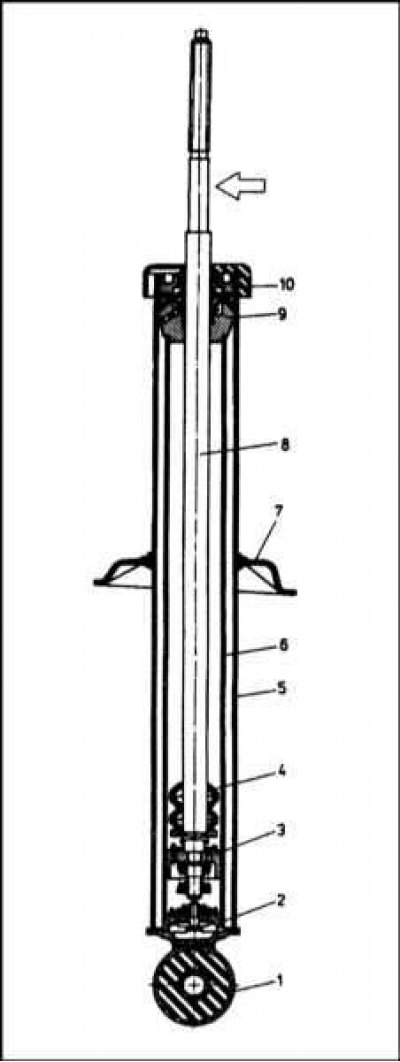
1 - Lower support; 2 - Compensation valve; 3 - Piston; 4 - Damper; 5 - Casing; 6 - Working cylinder; 7 - Spring plate; 8 - Rod; 9 - Guide sleeve; 10 - Cork (the arrow indicates the location of the factory marking)
Rear strut top components
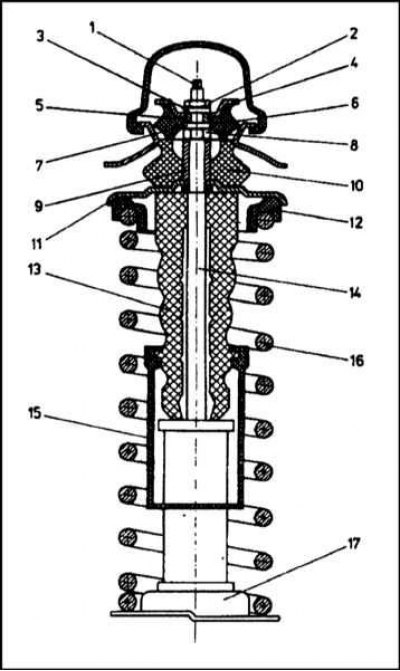
1 - rod rod; 2 - Nut; 3 - Washer; 4 - Cup; 5 - Bushing; 6 - Small rubber cushion; 7 - Washer; 8 - Nut; 9 - Bushing; 10 - Large rubber cushion; 11 - Spring plate; 12 - Rubber washer; 13 - Buffer compression stroke; 14 - Rod; 15 - Casing; 16 - Helical spring; 17 - Spring seat
Note. Prepare a tool for compressing coil springs. When removing components, remember their exact installation position.
1. After removing the rack from the car, clean it from the outside of accumulated dirt, then clamp the vise vertically. Using a special tool, compress the helical spring, completely removing the load from the plates. Follow the correct fixing of the tool on the coils of the spring (strictly follow the manufacturer's instructions).
2. Use a wrench to block the piston rod of the rack assembly from turning and give the upper fixing nut.
3. Remembering the correct installation position of the components, remove the upper support rubber pad, spacer, holder and upper spring plate.
4. Remove the coil spring, then the annular bushing, rubber stroke buffer and protective sleeve from the shock piston. If necessary, remove the cover from the upper part of the main body of the shock absorber, then the lower spring plate.
5. Make sure there are no signs of fluid leaks on the surface of the shock absorber. Check the piston rod along its entire length for cavities, and the shock absorber body for external deformations. Holding the rack vertically, check the serviceability of its functioning by moving the piston rod first from stop to stop, then in short jerks of 50 ÷ 100 mm. In both cases, the resistance to movement of the rod must be even and constant. If there are jerks or pinch points, or any other sign of damage, replace the failed strut.
6. Check all remaining assembly components for signs of wear and damage. Particular attention should be paid to the condition of the rubber pad and spring seat. Replace defective components.
7. If removed, reinstall the lower spring plate and snap the upper shock absorber cover into place.
8. Put the compression stroke buffer and protective sleeve on the piston, then install the helical spring, making sure that its lower end is correctly positioned relative to the plate stop.
9. Having fully extended the shock absorber, put the upper spring plate in place and turn it with an emphasis in the right direction with respect to the end of the spring.
10. Install the ring bushing, spring retainer, spacer bushing and top support rubber pad. Screw on the nut. Secure the shock absorber piston rod from turning and tighten the nut to the required torque.
11. Check that the spring is correctly positioned against the stops on the top and bottom cymbals, then release the compression tool and remove it from the rack.