

Pic. 10.11. Cross-section of the upper mounting of the rear suspension block
1. Top fastening nut; 2. Gasket; 3. Bottom support cup; 4. Lid (where available); 5. Upper spring cup; 6. Spring washer; 7. Rubber buffer; 8. Dust cap; 9. Lid (where available); 10. Washer; 11. Top support cup; 12. Rubber cushion; 13. Piston rod nut; 14. Gasket; 15. Gasket; 16. Bottom rubber cushion; 17. Body; 18. Spring; 19. Shock absorber.
Removing
1. Park the vehicle on level ground, engage a gear, and block the front wheels.
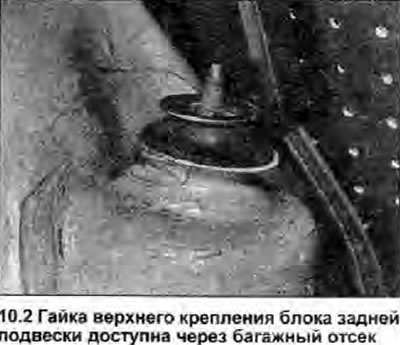
2. Working in the cabin, unscrew the top nut (see photo). Remove the nut and washer, then the upper bearing cup, rubber buffer and lower bearing cup.
3 Jack up the rear of the vehicle and place it securely on axle stands so that both wheels are off the ground: remove the wheel if better access is required.
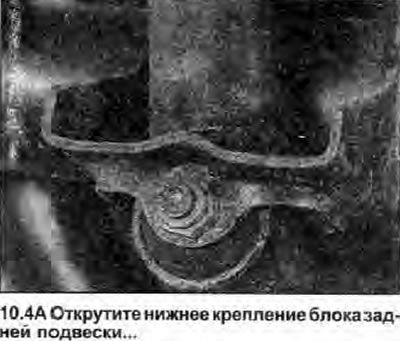
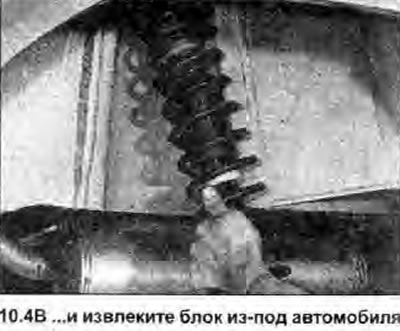
4. Unscrew the lower mount, and carefully remove the suspension unit from under the car (see photo).
 |  |
Bulkhead
Warning: Before starting to disassemble the suspension strut, it is necessary to compress the spring with a special tool. Any attempt to disassemble the stand without such a tool may result in personal injury; do not attempt to loosen the piston rod nut when the strut is installed on the vehicle.
Note: If either of the front springs needs to be replaced, it is recommended that both be replaced as a matched pair. Both springs must have the same marking, contact your Skoda dealer. Similarly, if either of the A-pillars needs to be replaced, it is recommended that both be replaced as a matched pair. Store suspension struts in an upright position. If the strut is installed after a long period of storage, clamp it vertically in a vice, and pump the shock absorber by moving the piston rod up and down several times until it stops, so that the channels are flushed and the damping properties are restored.
5. Remove the suspension unit from the vehicle and clean it thoroughly.
6. While holding the piston rod from rotation with a wrench, loosen the nut, but do not completely unscrew it yet.
7. Install the pullers and compress the spring evenly to release the upper spring seat.
8. Loosen the piston rod nut, and remove the top mounting components, top spring seat, rubber pad, dust cap, and spring.
9. Inspect all rack components and replace any worn or damaged components. Pay special attention to the top mount components, look for cracks, deformation or contamination of the rubber.
10. Check the top mount ball bearing, which should rotate easily without play. If the bearing rotates hard, is corroded or has play, replace it. Press the insert out of the bearing base plate, then knock out the bearing. A new bearing can be installed using a press or vise.
11. If the spring is broken, damaged. or free length is significantly less than specified in Specifications, it needs to be replaced.
12. Check the function of the shock absorber by clamping it vertically in a vise and moving the piston rod all the way up and down; equal resistance should be felt in both directions. If the damping is weak, there are oil leaks, the piston rod is bent or damaged, the shock absorber must be replaced.
13. Assembly is carried out in the reverse order of removal, paying attention to the following:
- A) Pull the piston rod completely out of the shock absorber. Install the spring (compressed), the top support, and check that the top fixing components are installed in the correct order.
- b) To heal the piston rod nut with a tightening torque specified specifications, hook the wrench on a steelyard or similar tool.
- c) Once the nut is tight, loosen the spring compression tools and remove them, then make sure the top mount rotates freely.
- d) Install the stand in the car.
Installation
14. Install in the reverse order of removal paying attention to the following.
- A) Thoroughly clean the wheel arch area and all attachment points
- b) Tighten all nuts and bolts with a tightening torque specified specifications, where given.