Note: The original ball joint is riveted to the lower control arm; when replacing it, use nuts and bolts instead of rivets. Proceed as described in the relevant subchapter below. Ball joint dust cap can be replaced separately (removing both circlips) after the ball joint pin is disconnected from the steering knuckle (see below). Note, however, that if the dust cap is damaged, it is recommended that the ball joint be replaced.
Removing
Riveted ball joint
1. Jack up the front of the vehicle and support it securely on axle stands.
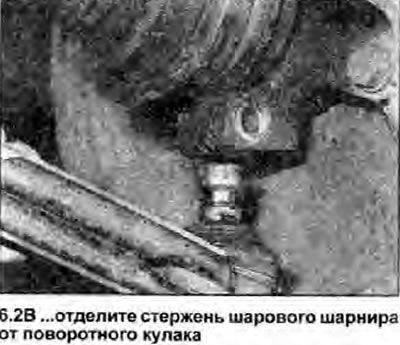
2. Turn off a nut, and remove completely a coupling bolt attaching the spherical joint to a rotary fist. Pull the lower arm down and disconnect the ball joint rod from the steering knuckle (see photo).
 |  |
3. Remove the lower arm (Chapter 5).
4. Remove the rivets; the rivet heads are drilled out with a drill, and then the rivet stands are squeezed out using a press.
5. Remove the old ball joint from the lower arm.
Bolted ball joint
6. Jack up the front of the vehicle and support it securely on axle stands.
7. Turn off a nut, and remove completely a coupling bolt fixing the spherical joint to a rotary fist. Pull the lower arm down and disconnect the ball joint shaft from the steering knuckle.
8. Unscrew the ball joint from the lower arm.
Installation
9. Install in the reverse order of removal paying attention to the following.
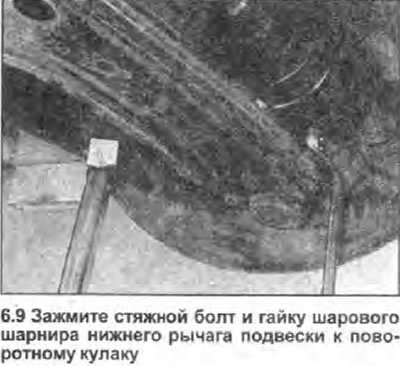
- A) Tighten all disturbed nuts and bolts with the tightening torque specified specifications (photo).
- b) Depending on the reason for the work, it is advisable to check the installation of the wheels (Chapter 21) Finally.