
Inspection
1. If improved access is required, jack up the front of the vehicle and place it securely on axle stands.
2. Check the condition of the rubber pads so that there is no delamination from the metal base; replace the gimbal if there is any damage or contamination.
3. Make sure the hanger fasteners are secure; use a torque wrench if possible.
4. Using a large screwdriver, check the hangers for signs of wear by carefully turning them laterally and checking for play; where this is not possible, have a second person move the engine/transmission unit back and forth or side to side while watching the gimbal move. Some play is acceptable even on new components, but if there is excessive play, first check that the fasteners are properly tightened before deciding if the rubber pad needs to be replaced.
Replacement - general information
Right suspension
5. The rubber of the right engine mount is an integral part of the water pump body. To remove and install the rubber cushion from the pump, a hydraulic press and several special punches and spacers are used. Therefore, if the suspension requires replacement, remove the water pump and contact your Skoda dealer.
Left suspension
6. The left engine mount rubber is an integral part of the transmission end cover. A special Skoda tool is used to remove and install the rubber cushion from the cover. Therefore, if the suspension requires replacement, remove the transmission as described in Section 7, and contact your Skoda dealer.
Rear suspension
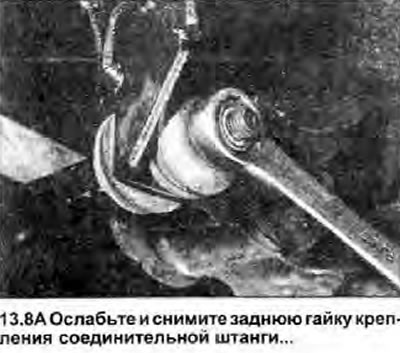
7. The rear suspension rubber is an integral part of the rear suspension bar. If the rubber cushion needs to be replaced, remove the bar and contact your Skoda dealer.
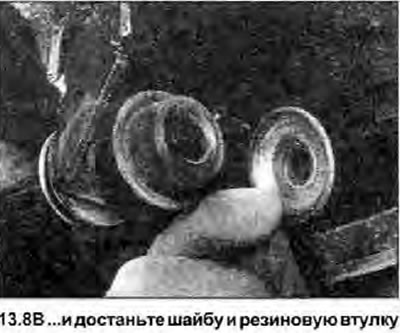
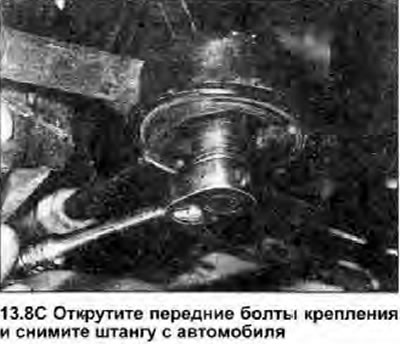
8. To remove the bar, apply the handbrake, then jack up the front of the vehicle and place it on axle stands. Remove the nut securing the rear of the stem to the suspension bracket on the subframe and remove the washer and rubber bushing from the threaded end of the stem. Unscrew the bolt that secures the rod to the suspension bracket, and remove the rod from under the car, notice the second rubber bushing and washer that are installed on the end of the rod (see illustrations). Inspect bushings for signs of wear and replace as needed.
 |  |
 |
9. Install in reverse order. Make sure the stem nut and bolt are securely tightened.