



Radiator of the cooling system
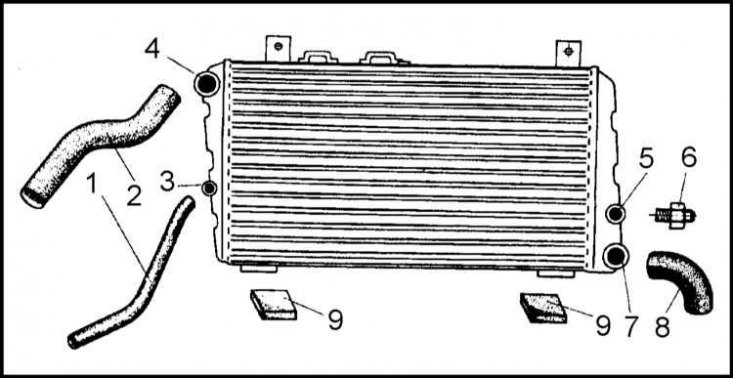
1 - Coolant supply hose from the engine; 2 - Coolant supply hose from the expansion tank; 3 - Coolant supply pipe from the thermostat housing; 4 - Coolant supply pipe from the expansion tank; 5 - Hole for installing a temperature-sensitive switch sensor; 6 - Temperature sensitive switch; 7 - Coolant outlet pipe; 8 - Coolant drain hose; 9 - Rubber support pads
Radiator of the cooling system - general information
Models 1.3 l
1. The engine cooling system of the models of cars under consideration is equipped with a tubular radiator with horizontal flow of coolant, manufactured under license from the French company Sofica. The general appearance of the radiator is shown in the illustration.
2. The radiator heat exchanger is a set of horizontally located aluminum tubes, connected at both ends to plastic side containers. The connections are made by pressing, and the joints are sealed using rubber gaskets placed on a special paste.
3. At the bottom of the right side tank there is a branch pipe for draining the coolant from the radiator, and above it there is a hole for installing a temperature-sensitive sensor-switch.
4. At the top of the left side tank there is a coolant supply pipe, and underneath it is a pipe connecting the radiator to the expansion tank.
5. The bases of both side tanks rest on the front cross beam of the vehicle via rubber cushions.
6. The upper edge of the radiator is attached to the upper front cross member with two M6x12 bolts.
7. Due to the materials used, the radiator has a low weight and has greater external and internal corrosion resistance compared to traditional radiators. At the manufacturing plant, all radiators are subject to mandatory leak tests, for which compressed air is supplied into the heat exchanger, the pressure of which exceeds the operating values.
1.6L models without air conditioning
On models without a/c, equipped with a 1.6 l engine, a larger radiator (285x590) manufactured by Autopal is used. Both pipes are on the left side of the radiator, the liquid moves horizontally.
Diesel models without CV and petrol models 1.6 l with CV
1. These models use a radiator manufactured by AKG, type ML3, with dimensions of 322x590 and oval-section tubes. The radiator is double-row, with horizontal liquid flow.
2. The radiator mounting scheme has been slightly modified: the lower part has lugs on which rubber cushions are placed. Then the radiator is inserted into the body openings. Two plastic clamps with M6 bolts are provided on top.
Removal
Note: If the radiator is removed to identify the source of the leak, remember that small leaks can be repaired in situ using a special radiator sealant.
Disconnect the negative battery cable, then drain the cooling system.
Petrol models
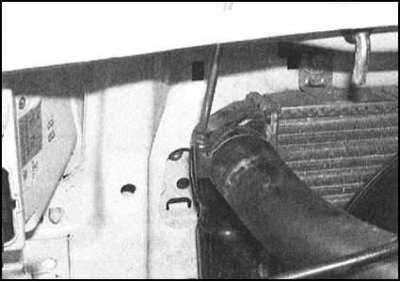
1. Loosen the mounting clamps and...
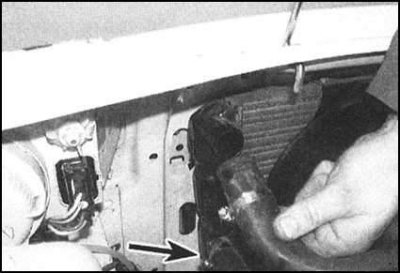
...disconnect the upper and lower radiator hoses. On 1.3L models, also disconnect the expansion tank hose.
 |
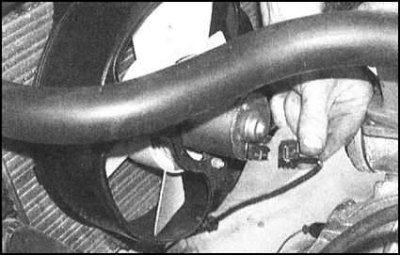 |
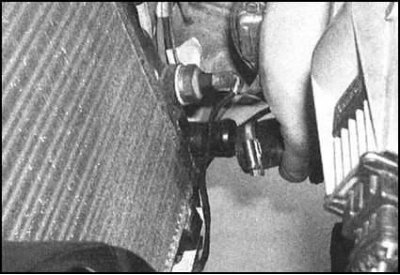
2. Disconnect the electrical wiring connectors of the drive motor and the cooling fan switch sensor. Release the electrical wiring from the clips on the radiator housing and fan shroud.
3. Remove the bolts securing the radiator to the upper cross member of the front of the vehicle (the hood lock latch is mounted in this beam).
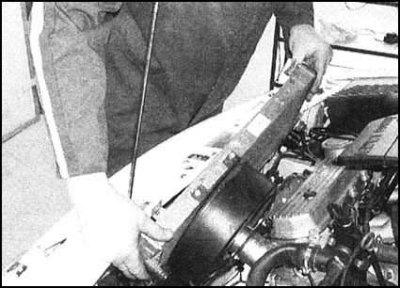
4. Remove the radiator from the lower supports and remove it from the engine compartment...
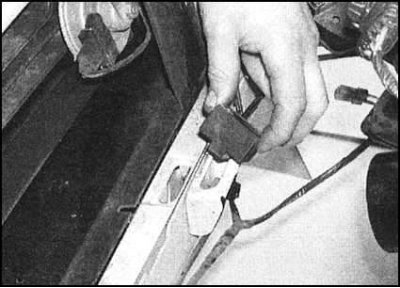
...try not to lose the rubber cushions of the lower supports.
Note: On some models, to provide sufficient working space, it will be necessary to unbolt and remove the reinforcement bar that connects the upper front crossmember to the front skirt.
Diesel models
1. Loosen the clamp and disconnect the upper hose from the radiator.
2. Loosen the mounting bolt on the lower hose coolant pipe bracket. Release the clamp, disconnect the pipe from the thermostat housing hose and remove it from the engine compartment.
3. Remove the cooling fan assembly (see section Checking the proper functioning, removal, installation, disassembly and assembly of the cooling system fan).
4. Disconnect the electrical wiring from the cooling system fan switch screwed into the radiator.
5. On models equipped with power steering, unbolt the hydraulic fluid reservoir from the crossmember and move it away from the radiator. To avoid splashing fluid, try not to tilt the reservoir excessively.
6. Remove the bolts securing the radiator to the upper cross member of the front of the vehicle (with hood latch).
7. Remove the radiator from the lower supports and remove it from the engine compartment. Immediately remove the rubber cushions of the lower supports.
Checking the status
1. If the reason for removing the radiator was a suspicion of a violation of the patency of its heat exchanger, it should be back-flushed. With a soft brush (do not cut your fingers on the edges of the plates) clean the gaps between the radiator heat exchanger plates. If you have access to a source of compressed air, blow out the gaps (don't forget to wear safety glasses).
Attention! Remember that the fragile plates of the radiator heat exchanger can easily be damaged if handled carelessly!
2. If necessary, a service station can perform a "flow" check of the radiator for blockages in the internal channels.
3. Repair of a radiator that has lost its tightness should be carried out only in a specialized workshop. Attempts to correct the situation with a soldering iron will only lead to damage to the plastic components.
4. In extreme situations, minor coolant leaks from the radiator can be stopped using a special sealant without removing the radiator from the car (in situ). Follow the instructions for using the sealant.
5. Before sending the radiator to the repair shop, remove the fan switch sensor from it.
6. Check the condition of the rubber cushions of the radiator supports. Replace if necessary.
Installation
Installation is carried out in the reverse order of dismantling. Pay special attention to the following points:
- a) Ensure that the radiator is correctly engaged in the lower support assemblies. Tighten the mounting bolts securely.
- b) Ensure that all hoses are connected correctly and securely fastened with clamps.
- c) Finally, do not forget to fill the cooling system.