
Thermostat and related components
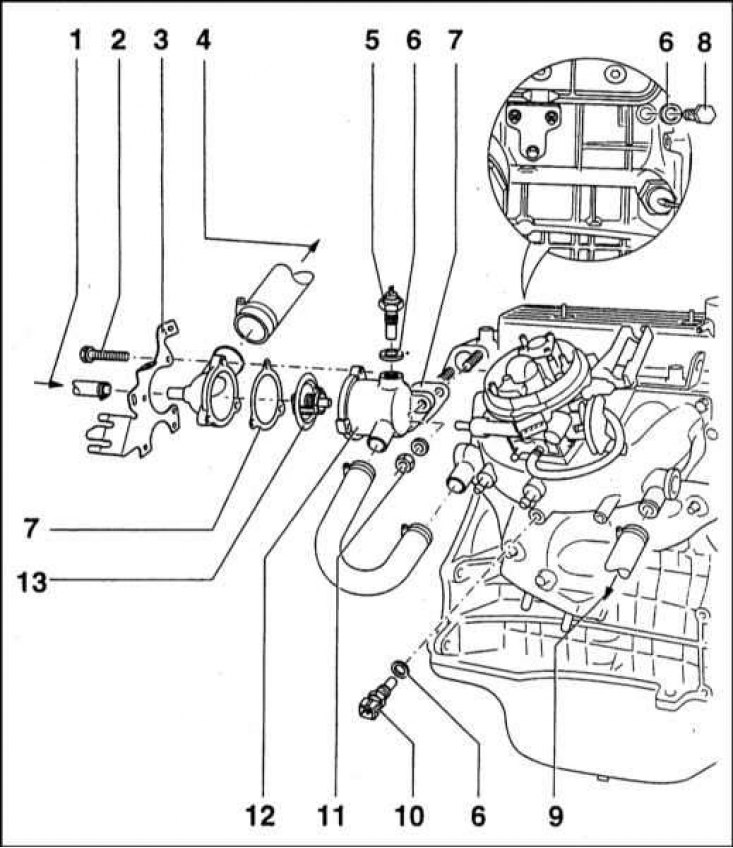
1 - From the expansion tank; 2 - Bolt; 3 - Mounting bracket; 4 - To the radiator; 5 - CTS (temperature sensor); 6 - O-ring (to be replaced); 7 - O-ring (to be replaced); 8 - Drain plug; 9 - To the heater heat exchanger; 10 - Injection coolant temperature sensor; 11 - Nut; 12 - Thermostat casing; 13 - Thermostat
Removing
1. The thermostat components are shown in the illustration.
2. Disconnect the negative cable from the battery, then empty the cooling system.
Petrol models
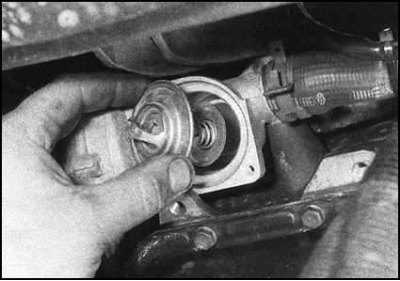
1. The thermostat housing is installed on the left side of the cylinder head.
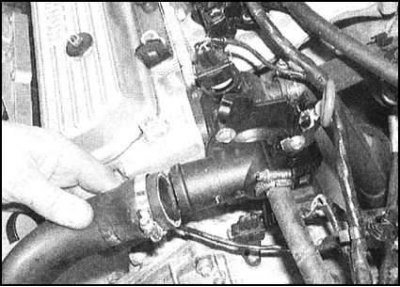
2. Release the clamp (s) and disconnect the hose (And) cooling path from the thermostat cover.
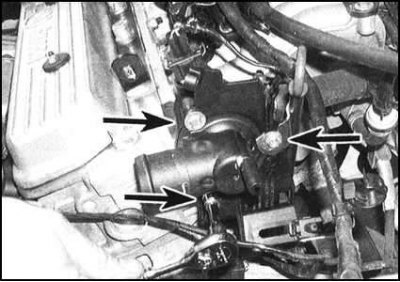
3. Turn out the fastening bots
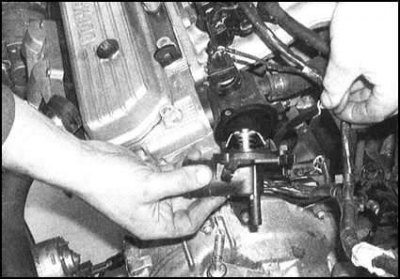
and remove the thermostat cover from the engine together with the sealing ring / gasket. When assembling, the ring / gasket must be replaced without fail.
4. On 1.3 liter models of early years of production (until February 1996) and on all 1.6 l models, remove the thermostat from the housing. Try to remember its installation position.
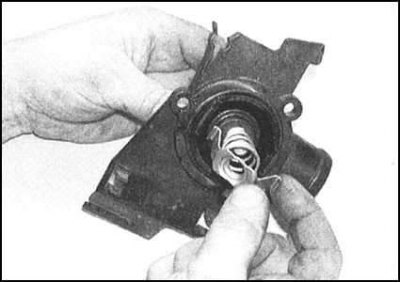
5. On models of 1.3 l of later years of production (since February 1996) the thermostat assembly is fixed in the housing cover with a special lock. Remembering the installation position of each component, release the lock,
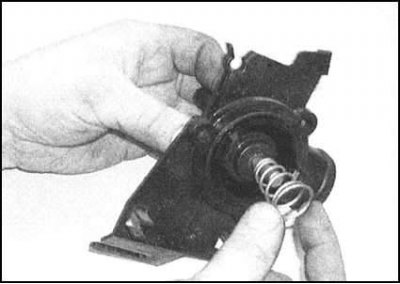
remove the spring
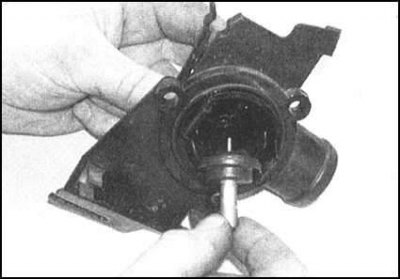
and remove the thermostat plunger from the cover.
Diesel models
1. The thermostat is installed in the base of the water pump housing. Apply the parking brake to gain access, then jack up the front of the vehicle and support it on jack stands. Loosen the fixing screws and remove the crankcase protection panel.
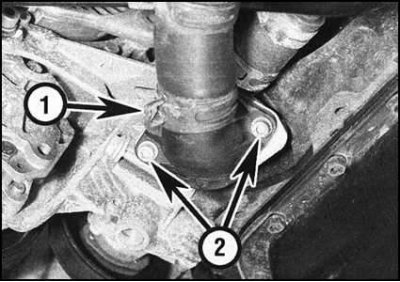
2. Release a collar and disconnect a hose of a cooling path from a cover of the thermostat.
3. Turn out fixing bolts and remove from a casing of the thermostat a cover together with a sealing ring. The ring must be replaced during assembly without fail.
4. After removing the cover, remove the thermostat assembly from the casing. Try to remember its installation position.
Functional check
Attention! On 1.3 L models of later years of production (since February 1996) the test is carried out after installing the components in the cover of the thermostat housing.
1. A rough check of the proper functioning of the thermostat can be made by tying it to a wire and lowering it into a container of water. As the water heats up when boiling, the thermostat valve should open, otherwise the assembly must be replaced.
2. If a suitable thermometer is available, it is possible to determine the exact opening temperature of the thermostat - compare the measurement result with the marking data on the assembly body or requirements Specifications at the beginning of this chapter.
3. The thermostat, which does not close when the water cools, must also be replaced.
Installation
Petrol models
1. On models of 1.3 l of later years of production (since February 1996) install the thermostat plunger with spring into the cover of the casing, then snap the latch.
2. On models 1.3 release before February 1996 and models 1.6 l, install the thermostat in the casing (check the correct location of the assembly).
3. On all models, install a new O-ring/gasket, then seat the thermostat cover on the housing and tighten the cover bolts to the required torque.
4. Connect a hose to the thermostat cover (And) cooling path, firmly tighten the clamp (s).
5. Prime the cooling system and connect the negative cable to the battery.
Diesel models
1. Install a new O-ring on the thermostat cover.
2. Insert the thermostat assembly into the housing (make sure it is installed correctly), then put the cover on. Screw fixing bolts and tighten them with the required effort.
3. Connect a hose of a cooling path and fix it with a collar.
4. Reinstall the crankcase guard, tighten the mounting screws securely, then lower the vehicle to the ground.
5. Fill the cooling system and remove air pockets from it and connect the negative cable to the battery.