
General information
The auxiliary belt is used to drive devices such as the generator, steering pump and water pump from the crankshaft pulley.
The multirib auxiliary belt is equipped with an automatic adjustment device.
Removing
1. Park the vehicle on level ground, apply the parking brake and chock the rear wheels. Loosen the right front wheel nuts.
2. Jack up the front of the car and place it on jack stands. Remove the right front wheel.
3. Turn out fixing screws and remove a cover of a belt.
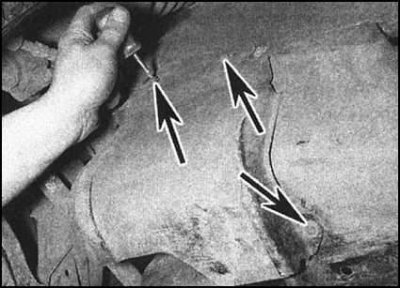 |  |
4. Check up a belt on presence of factory indexes of a direction of rotation. If necessary, apply the appropriate marking yourself.
5. Using a 15 mm open-end wrench, turn the tensioner roller counterclockwise, overcoming the spring force.
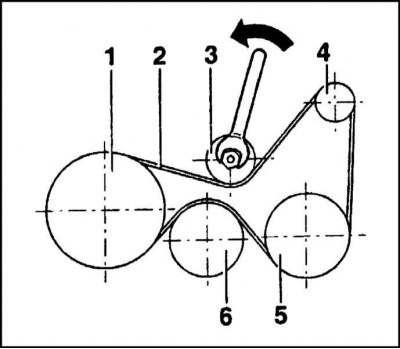
6. Remove the belt from the alternator pulley, then from the remaining pulleys.
Tension setting and adjustment
Attention! When installing the belt, be guided by the marking of the direction of its rotation.
1. Put the belt on the crankshaft pulley. Make sure that the ribs of the belt profile are correctly placed in the pulley grooves.
2. Overcoming the resistance of the spring, turn the tensioner roller counterclockwise with an open-end wrench.
3. Insert the flat side of the belt under the tensioner pulley, then slide it over the remaining pulleys. Watch for the ribs to hit the streams.
4. After releasing the roller, let it tension the belt.
5. Replace the cover and tighten the cover screws securely.
6. Install the wheel, lower the vehicle to the ground, then tighten the wheel bolts to the specified torque.