
Front oil seal
1. Drain the engine oil (see chapter Current service).
2. Remove the accessory drive belt (see Section Removing, installing and adjusting the tension of the auxiliary drive belt).
3. Remove the auxiliary belt pulleys and the outer timing belt covers, then bring the engine to the TDC position of the end of the compression stroke of the piston of the first cylinder and remove the timing belt and crankshaft gear (see Sections Bringing the piston of the first cylinder to the top dead center position (TDC) end of compression stroke, Removal and installation of the timing belt and its covers, Removal and installation of the tensioner and gears of the timing belt).
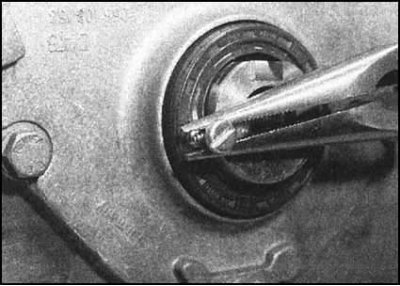
4. Drill a couple of small holes in the end surface of the stuffing box and screw self-tapping screws into them (try not to damage the walls of the socket and the surface of the shaft pin). Grasping the screw heads with pliers, remove the oil seal from the seat.
5. Without using any solvents, wipe the sides of the gland seat and the surface of the shaft journal with a clean, lint-free rag. Sand down any burrs, nicks or roughness that could cause failure of the new seal.
6. Lubricate the lips of the new oil seal and insert it into the socket in the casing.
7. By hammer blows on a mandrel of suitable diameter, press the stuffing box into the casing. An end head of a suitable size or a piece of pipe of the appropriate diameter can be used as a mandrel. The mandrel must rest exclusively on the hard outer edge of the stuffing box.
8. Reinstall all components removed for access and adjust belt tension (see Sections Bringing the piston of the first cylinder to the top dead center position (TDC) end of compression stroke, Removal and installation of the timing belt and its covers, Removal and installation of the tensioner and gears of the timing belt).
9. Fill the engine with the correct amount of engine oil of the correct grade.
Replacement of a sealing lining of a casing of a forward epiploon
1. Follow the procedures described in paragraphs 1 to 3, then remove the oil pan (see Section Pallet - removal, inspection and installation).
2. In several stages turn out bolts of fastening of a casing of an epiploon.
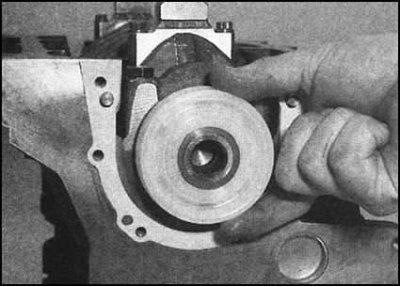
3. With rotational-translational movements, carefully remove the casing assembly with the oil seal from the crankshaft trunnion.
4. Remove the old gasket from the mating surface of the cylinder block. Using extreme caution, clean the mating surfaces of the casing and cylinder block, completely removing traces of the old gasket material from them (use a scraper or penknife).

5. If necessary, remove the old oil seal from its socket in the casing by carefully prying it out with a flat-bladed screwdriver.
6. Thoroughly wipe the casing and check it for cracks and signs of deformation of the mating surfaces. Lay the shroud on the workbench, mating surface down. If removed, press a new oil seal into the seat by pressing a wooden block against it and tapping on the last one with a hammer.
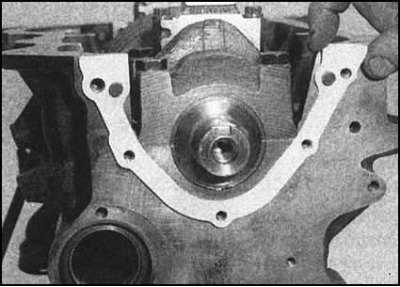
7. Grease an interfaced surface of the block of cylinders with universal hermetic and press a new lining of a casing to it.
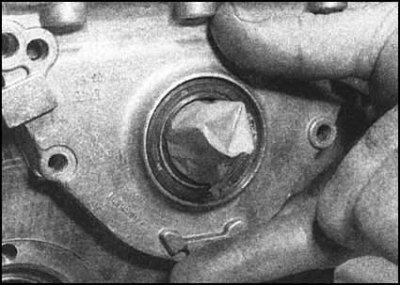
8. Wrap the crankshaft trunnion with adhesive tape..
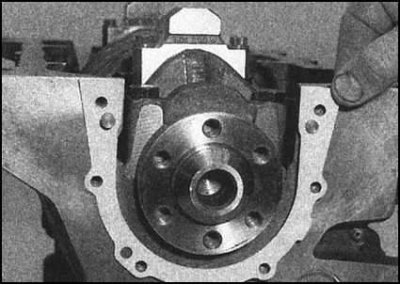
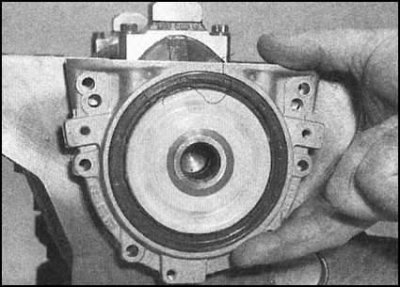
9. Lubricate the inner lips of the stuffing box with clean engine oil, bring the casing assembly to its regular place on the block and rotate it on the crankshaft trunnion, pressing it firmly against the block.
10. Screw in bolts of fastening of a casing and in several steps tighten them with the demanded effort.
Note. Remember that the shroud is made of soft aluminum alloy and can easily be damaged if the bolts are not tightened evenly.
11. Reinstall the oil pan (see Section Pallet - removal, inspection and installation).
12. Reinstall all other components removed for access, do not forget to adjust the tension of the belts (see Sections Bringing the piston of the first cylinder to the top dead center position (TDC) end of compression stroke, Removal and installation of the timing belt and its covers, Removal and installation of the tensioner and gears of the timing belt).
13. Finally, fill the engine with the required amount of engine oil of the required grade.
Rear oil seal
1. Follow the procedures described in paragraphs 1 to 3, then remove the oil pan (see Section Pallet - removal, inspection and installation).
2. Remove the gearbox from the engine (see chapter Transmission).
3. Remove the flywheel (see Section Flywheel - removal, inspection and installation), as well as the friction disc and clutch basket assembly (see chapter Clutch).
4. At the corresponding complete set turn out fixing bolts and remove an intermediate plate from the block of cylinders.
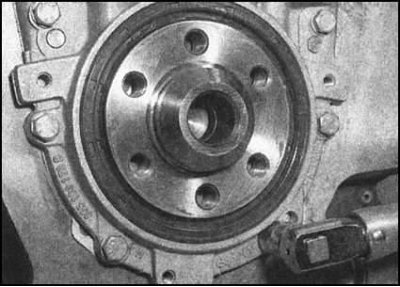
5. Loosen and remove the rear oil seal housing bolts in several steps.
6. Carefully remove the casing assembly with the stuffing box from the shaft stub with a rotational-translational motion.
7. Remove the gasket from the block and clean the mating surface.
8. The rear oil seal is replaced as an assembly with the casing and is not supplied individually.
9. Lubricate the mating surface of the block with universal sealant and install a new casing gasket on it.
10. A protective plastic sleeve is usually supplied with Skoda branded oil seals to avoid damage to the oil seal on the edges of the keyway when the assembly is put on the shaft trunnion. When installing a non-original oil seal, wrap the trunnion with tape.
11. Lubricate the inner jaws of the new oil seal with clean engine oil, then gently slide the assembly onto the trunnion, pressing it firmly against the block, with a rotational-translational motion.
12. Screw in fixing bolts and evenly tighten them in several steps to the required force.
Note. Remember that the shroud is made of soft aluminum alloy and can easily be damaged if the bolts are not tightened evenly.
13. Install the oil pan (see Section Pallet - removal, inspection and installation).
14. Install Friction Disc and Clutch Basket Assembly (see chapter Clutch).
15. Reinstall the gearbox (see chapter Transmission).
16. Finally, fill the engine with the required amount of engine oil of the required grade (see chapter Current service).