
Drive shaft seals
Note. Reassembly will require a new circlip securing the driveshaft inboard joint.
1. Apply the parking brake and chock the rear wheels. Jack up the front of the car and place it on jack stands. Remove the corresponding front wheel.
2. Drain the transmission oil, or have a rag ready to catch the oil spilled during the oil seal replacement.
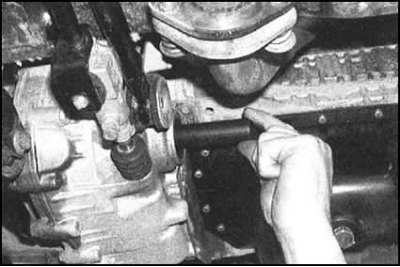
3. Release the inner end of the drive shaft from the gearbox, take it to the side and tie it with wire to the suspension elements.
Attention! If both drive shafts need to be disconnected, care must be taken to secure the differential side gears to avoid the risk of them falling out. After releasing the first shaft, thread a piece of metal bar or pipe with a diameter of about 26 mm into the shaft seat in the gearbox differential. If necessary, secure the rod to the outside of the gearbox housing with adhesive tape. If it is not possible to prevent the side gears from falling into the differential, the only way to remove them is to dismantle the gearbox and take it to a car service workshop.
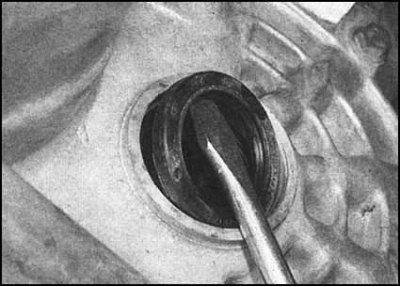
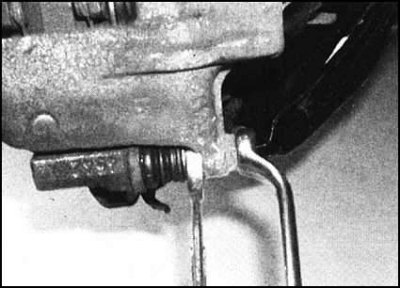
4. Gently pry the old oil seal out with a large flat-blade screwdriver and pry it out of its seat.
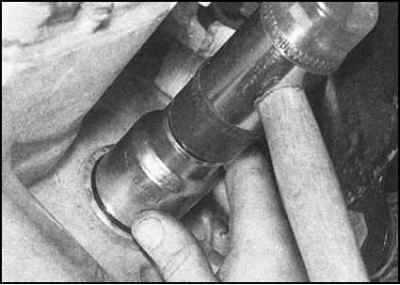
5. Thoroughly wipe the walls of the seat, then lightly grease the outer lips of the new oil seal with grease. Insert the new seal into the seat (sponges inside) and gently tap it until it stops, using a socket head of a suitable size or a piece of pipe of the appropriate diameter as a mandrel.
Note. The mandrel should rest only on the hard outer edge of the end face of the stuffing box.
6. Make sure that the oil seal is seated correctly in the manual transmission housing, then replace the drive shaft inner joint circlip and refuel the latter into the differential.
7. If the transmission oil has been drained, fill the manual transmission case with the required amount of fresh oil of the required grade. If the box crankcase has not been emptied, check the oil level. Make appropriate adjustments if necessary.
Fork shaft seal
Note. Reassembly will require a new stem roll pin.
1. Park the vehicle on a level, level surface, if possible paved. Firmly apply the parking brake, then jack up the front of the vehicle and support it on jack stands.
2. From the transmission end of the gear selection rod, remove the mounting collar, thereby providing access to the cylindrical
Note. During assembly, it would be more correct to replace the standard clamp with a screw or worm.
3. Using a hammer and drift, knock out the pin and disconnect the gear selector rod from the shift fork axle. The old pin can be thrown away, as it must be replaced during assembly without fail.
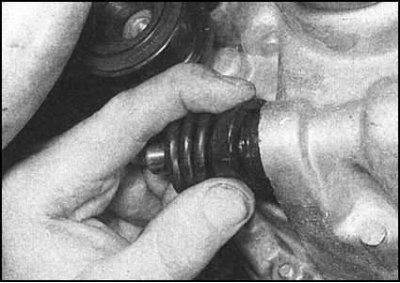
4. Remove the protective cover of the fork axle, then, using a screwdriver or pliers with long jaws, release the old gearbox housing oil seal and remove it from the end of the rod. Get ready to collect spilled oil - place a suitable drain container under the crankcase of the box.
 |  |
5. Check the sealing surface of the axle for defects that could cause the new oil seal to fail. If necessary, polish the axle pin with fine-grained sandpaper. If serious damage is found, the axle must be replaced.
6. Lightly lubricate the outer lips of the new oil seal and carefully slide it onto the shift fork shaft. Moving the stuffing box along the axis, put it in the receiving socket in the gearbox housing. Make sure that the gland is seated correctly on the thrust shoulders.
7. Connect the gear selection rod to the axle of the shift forks in the manual transmission and ensure that the mounting holes are aligned. Tap a new roll pin into the holes with a hammer and secure it with a screw or worm-type clamp.
8. Finally, adjust the gear oil level in the gearbox
Input shaft oil seal
1. Remove the gearbox from the vehicle and disassemble the clutch release mechanism (see Section Removing, checking the condition and installing the clutch release mechanism).
2. Remove the screws securing the clutch release bearing guide sleeve and remove the latter from the manual transmission input shaft trunnion. Note: The coupling may be too tight and may require some effort to remove.
3. Using a flat-blade screwdriver, carefully pry the old oil seal out of its seat in the guide sleeve assembly.
4. Check the sealing surface of the shaft journal for defects that could cause failure of the new stuffing box. If necessary, polish the trunnion with fine-grained sandpaper. If serious damage is found, the shaft must be replaced.
5. Dip the new oil seal in the clean oil and carefully place it into the receptacle at the rear of the release bearing guide (sponges outward, i.e. - towards the gearbox).
6. Wipe the input shaft trunnion again, lubricate it with grease, then carefully place the coupling with the oil seal in it in its regular place. Firmly press the coupling to the surface of the manual transmission boat, then screw in the mounting screws and tighten them to the required torque.