
Note: See Warnings given in Chapter 1 of this section before starting work.
1. If, as a result of the checks described in Section 1, You have identified a defective hose, replace it as follows. Drain the cooling system first (see section 1); If the antifreeze cannot be replaced, collect the drained coolant in a clean container. Although hoses are easier to remove while they are hot, do not attempt to disconnect any part of the system until it is cool (see chapter 1).
2. To disconnect the hose, loosen the hose clamps with a screwdriver, then move them along the hose, away from the end of the hose. Carefully remove the ends of the hose from the fittings. If the hose is equipped with wire or crimp type clamps, it is recommended to replace them with screw clamps when installing a new hose.
3. Please note that the radiator pipes are fragile; do not use too much force when trying to remove the hoses from them. If the hose is stuck, try to free it by turning its end on the nozzle. In extreme cases, cut the hose, then cut the stuck end lengthwise into two parts and remove them from the nozzle.
4. When installing a new hose, first put on the clamps on it, then put the hose on the nozzles (see photo). If the hose is somewhat hardened, use soapy water as a lubricant or soften the end of the hose by immersing it in boiling water. Be careful not to scald while doing this.
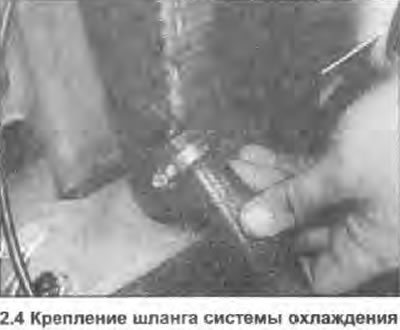
5. Fully install the hose ends into their respective fittings, make sure the hose is properly routed in relation to other components, then slide the hose clamps along the hose to its attachment points (behind the expanded pipe sections) and clamp them securely.
6. Fill the system with coolant (see section 1).
7. Check the system carefully for leaks.