



Contents: Removal ⬇ Installation and adjustment ⬇
Removal
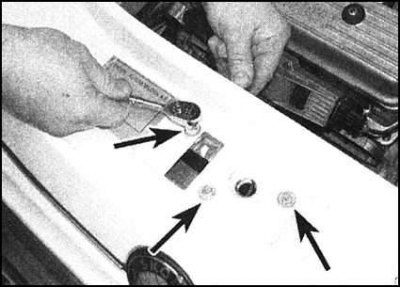
1. Open the hood, then remove the three bolts securing the lock assembly to the front cross member.
2. Release the lock assembly from the rear of the crossmember, then release the locking tab on the drive cable end and disconnect the cable from the lock lever. The lock can now be removed from the vehicle.
Installation and adjustment
1. Connect the cable core to the lock lever and place the sheath in the bracket. Now check the cable assembly for proper adjustment.
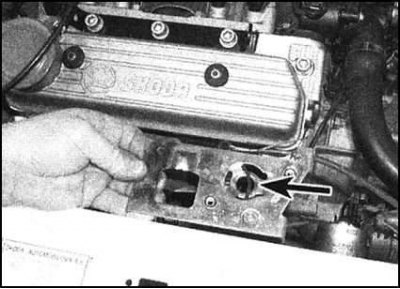
2. When the cable is correctly connected to the lock, there should be no slack in it at all, the lever should rest against the stopper, and there should be a gap of 3 mm between it and the edge of the hole in the striker pin.
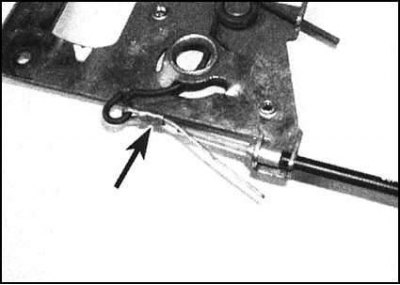
3. Adjustment is made by releasing the fastening clamp and adjusting its position. Once a satisfactory result has been achieved, firmly lock the clamp.
Article reprinted from the website [skodabook.ru]
4. Once the adjustment is complete, place the lock under the front cross member and seat it in its proper place. Screw in the mounting bolts, make sure the striker pin is positioned correctly, then tighten the fasteners to the required torque.
5. Lubricate the lock components with a multi-purpose grease, then check the assembly for proper operation. If necessary, the position of the striker pin can be adjusted by loosening the mounting plate bolts and adjusting the position of the latter on the hood. Once the result is satisfactory, tighten the mounting bolts. Note that the length of the striker pin determines the height of the hood lid in the closed position (see section Removal, installation and adjustment of the hood).