



Contents: Cleaning ⬇ Examination ⬇
Cleaning
1. Remove all attachments and components from the unit, as well as electrical sensors and switches. For a complete cleaning, it is also necessary to remove the squeeze plugs of the water galleries - drill small holes in the plugs, screw in self-tapping screws and, grasping the screw heads with pliers, remove the plugs from the unit.
2. Scrape off all traces of old gasket material and sealant from the mating surfaces of the block. Be careful not to damage the gasket/sealing surfaces.
3. Remove all oil gallery plugs (where they are provided). The plugs are very tightly seated and may require drilling out and then restoring the thread with a tap. When assembling the engine, the plugs must be replaced without fail.
4. If the crankcase is heavily soiled, steam cleaning will have to be used. After returning the block from cleaning, the oil passages and galleries must be cleaned again. Rinse all internal cavities of the block with warm water. Continue rinsing until clean water begins to flow out of the holes. Dry the block thoroughly, then lightly lubricate its mating surfaces and cylinder mirrors with oil to prevent corrosion. If you have access to a source of compressed air, use it to speed up the drying process and blow out the holes, channels and galleries.
Caution! Wear safety glasses when using compressed air!
5. If the engine crankcase is not too dirty, it will be enough to wash it with hot soapy water using a hard brush. Do not try to save time on washing the block - take this procedure very seriously. Regardless of the cleaning method chosen, as a result, all oil holes and channels should be absolutely clean, and the block should be thoroughly dried. To prevent corrosion, lightly lubricate the cylinder mirrors with oil.
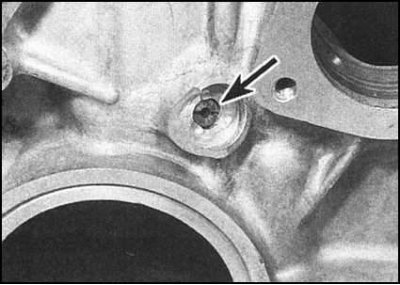
6. All mounting holes in the block must be "run" with a tap of the appropriate size, carefully removing corrosion products, old sealant and other deposits from the threads. In addition, such "running" will help restore damaged threads. If possible, blow out the holes with compressed air, removing chips and debris from them.
Caution! All traces of grease and solvent must be completely removed from blind holes to avoid damage to the block casting by hydraulic pressure when tightening the bolts.
7. Apply a suitable sealant to the new oil gallery plugs and screw them into their holes in the block. Tighten the plugs securely.
8. If you are not going to start assembling the engine immediately, wrap the block in a clean plastic bag. Do not forget to also take care to protect the mating surfaces and cylinder mirrors from corrosion.
Examination
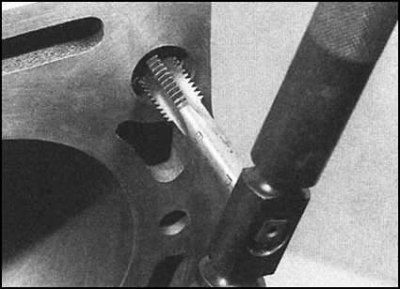
1. Inspect the block casting for cracks and corrosion. Check for stripped threads in any of the mounting holes. If you suspect internal coolant leaks, it may make sense to contact a car service specialist and ask them to perform a thorough inspection of the block using special equipment. If necessary, perform restoration repairs or replace the block.
2. Remove the cylinder liners and check their surfaces for scratches and burrs. In order to maintain manufacturing tolerances, liners are produced in three size groups. The corresponding marking is applied to the wall of each liners.
3. For a more accurate assessment of the degree of wear of the liners, it is necessary to measure their diameters at several points. Insert a bore gauge into the liner of the first cylinder and measure its diameter in three different sections parallel to the crankshaft axis. One measurement is made in the upper part of the liner, directly under the edge of the step wear flange, the second - in the central part of the liner and the third - immediately above its lower cut. Measurements are made in two planes - parallel and perpendicular to the crankshaft axis.
4. Compare the measurement results with the requirements Specifications. If any of the results are outside the acceptable range, the corresponding sleeve must be replaced.
5. To determine the clearance of the pistons in the cylinder liners, it is necessary to subtract the diameter of the piston measured along its skirt from the diameter of the liners (see section Removal, condition check and installation of connecting rod and piston assemblies).
6. Alternatively, insert the piston into the appropriate sleeve and measure the clearance using a blade-type feeler gauge. The piston should be inserted into the sleeve in the normal position, and the clearance is measured along one of its thrust surfaces, directly above the lower edge of the sleeve.
7. If the gap size exceeds the value specified in Specifications acceptable value, it is necessary to replace the piston. If the piston jams at the bottom of the stroke, with a gradual weakening of the fit as it moves up, then there is a taper of the sleeve. Jamming of the blades of the feeler gauge when it is moved along the perimeter of the generatrix surface of the piston indicates ovality of the sleeve.
8. Repeat the procedure, assessing the condition of the liners of each cylinder.
9. If signs of excessive wear or damage to the mirrors are detected, the defective sleeves must be replaced.
(This material is published on the portal: «SKODABOOK.RU»)
10. Only liners of the same size group as the failed ones should be installed as replacement ones. The same applies to pistons. In this case, the piston size must correspond to the liners size group. The corresponding marking is applied to the liners walls and piston bottoms.
11. If the degree of wear of the mirrors is low, it will be sufficient to simply replace the piston rings.
12. The cylinder liners must be honed to ensure that the new piston rings fit correctly.
13. Honing requires a special tool (honing) that allows you to apply a uniform grid pattern to the surface of the mirror. Such uniform "roughening" of the mirror ensures the quality of the piston ring running-in and guarantees the proper tightness of the piston seat in the sleeves. Honing tools are available in two types, both designed for use with an electric drill. The "bottle brush" type hone is a hard cylindrical brush with abrasive inserts in the bristles. The more common surface hone is equipped with an attachment in the form of sharpening stones equipped with spring-loaded legs. The authors of this Guide recommend that novice amateur mechanics use a hone of the first type.
Note: If desired, honing can always be entrusted to specialists at a car service workshop for a very reasonable fee.
14. Prepare a hone of the types described above, an electric drill, a sufficient amount of clean rags, some honing oil and safety glasses.
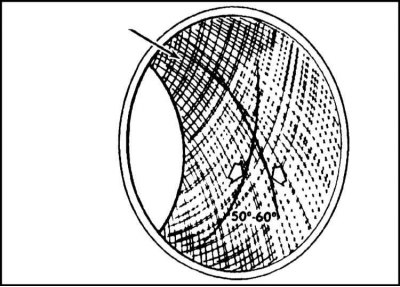
15. Clamp the hone into the chuck of the electric drill. Wet the cylinder bores with honing oil and load the hone into the first cylinder, having first compressed its spring-loaded sharpening stones (if the second type of nozzle is used). Turn on the drill and immediately begin moving the attachment up and down the cylinder, achieving a uniform line pattern on the cylinder mirror in the form of a grid with a diamond-shaped cell, the sides of which intersect at an angle of about 60°. Some piston ring manufacturers insist on other values for the angles of intersection of the lines of the pattern - check the instructions included with the set of new piston rings.
Attention! Don't forget to wear safety glasses!
16. Do not skimp on oil when honing cylinders. Do not remove more material from the cylinder bore than is really necessary to achieve the desired result. Do not remove the hone from the cylinder bore until it has completely stopped rotating - continue to make reciprocating movements with the drill all this time. After the drill has stopped, continue rotating its chuck in the same direction manually and remove the nozzle from the cylinder.
17. Carefully wipe the mirror with a clean rag and proceed to honing the liner of the next cylinder. After finishing the procedure, wash the cylinder block with hot water and soap, completely removing all traces of abrasive and honing oil. Cleaning can be considered complete when, when passing a white rag soaked in oil over the liner mirrors, no gray stain remains on the latter.
18. To remove the liners, turn the cylinder block over and place it on wooden blocks. The liners can now be knocked out of the cylinders using a punch made from hard wood.
19. Once all the liners have been released, lay the cylinder block on its side and remove the liners manually.
20. Remove the sealing washers from the bases of the sleeves and measure their thickness. Washers of different sizes are available and by selecting them, the amount of protrusion of the sleeves above the block surface is adjusted. Select replacement washers for each of the sleeves.
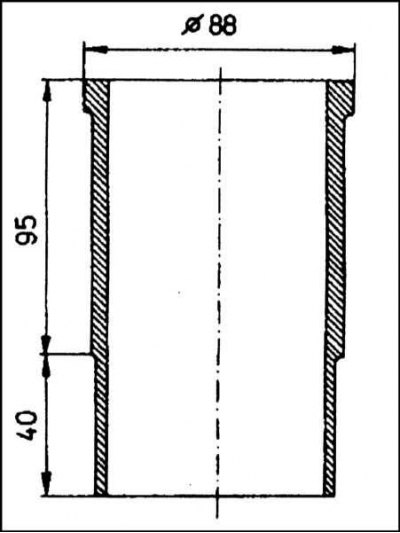
21. The main geometric characteristics of the sleeves are shown in the illustrations. If the sleeves are in good condition and are subject to further use, mark them with tape to indicate that they belong to your cylinder.
- a — Designation of the cartridge case size class
- b — Place of measurement of the internal diameter
 |
 |
22. Before installation, carefully wipe the mating surfaces of the sleeves and sides, then use fine-grained sandpaper to remove all burrs, nicks and roughness that could lead to failure of the new sealing washers.
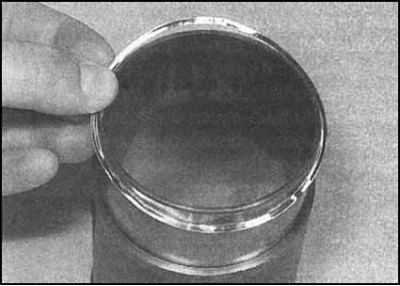
23. Carefully wipe the liners and install new sealing washers of the required thickness on them. Lubricate the walls of the liners with clean engine oil.
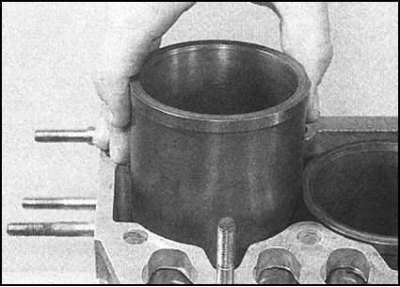
24. When installing old liners, make sure that the seat marks applied during dismantling are correctly aligned. Try to prevent the sealing washers from falling out when the liners are seated in the cylinders. At the first stage, the liners should be pushed into the cylinders manually until they stop. Then the liners are tapped with a hammer through a wooden block until they stop against the seat shoulders.
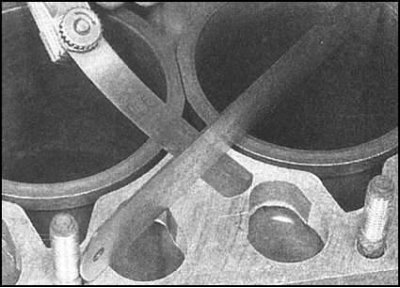
25. After installing all four sleeves, measure the amount of their protrusion above the plane of the block - use a steel ruler and a blade-type feeler gauge. Compare the measurement results with the requirements Specifications.
26. If necessary, remove the incorrectly seated sleeve and replace the sealing washer on it. Washers are available in thicknesses of 0.10, 0.12 and 0.14 mm.
27. After replacing the washer, install the sleeve and check the amount of its protrusion again.
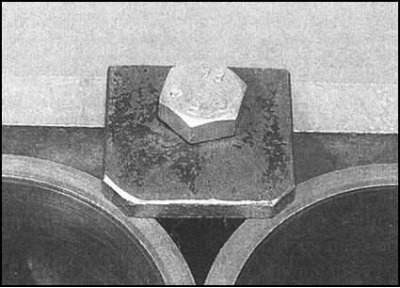
28. After finishing adjusting the fit of the liners, temporarily fix them in the cylinders with special rectangular washers
1.6L and diesel engines
1. Visually inspect the block casting for cracks and corrosion. Check for stripped threads in any of the mounting holes. If you suspect internal coolant leaks, it may make sense to contact a car service specialist and ask them to perform a thorough inspection of the block using special equipment. If necessary, perform restoration repairs or replace the block.
2. Check the cylinder bores for scratches and scoring. If such defects are found, the condition of the corresponding pistons should be checked (see section Removal, condition check and installation of connecting rod and piston assemblies). Defects that are in the initial stage of development can be eliminated at this stage by turning the block in a car service workshop.
3. For a more accurate assessment of the degree of cylinder wear, it is necessary to measure their diameters at several points. Insert a bore gauge into the first cylinder and measure its diameter in three different sections parallel to the crankshaft axis. One measurement is made at the top of the cylinder, directly under the edge of the stepped wear flange, the second - in the central part of the cylinder and the third - at a distance of about 10 mm above its lower cut.
Note: The block must be installed on the workbench strictly horizontally.
4. Repeat the measurements, this time in planes perpendicular to the crankshaft axis. Record the results of all six measurements and compare them with the requirements Specifications. If the difference in diameters of any of the two cylinders is outside the permissible range, the cylinders are subject to reaming followed by replacement of the pistons with new ones of the corresponding repair size. The only alternative to reaming the cylinders is a complete replacement of the block complete with pistons.
5. Using the records of the results of measurements of the piston diameters (see section Removal, condition check and installation of connecting rod and piston assemblies), calculate the clearances for the pistons in the cylinders by subtracting these diameters from the cylinder diameters. Since the requirements for the piston fit at the time of writing this Manual have not been specified by the manufacturers, please consult with the specialists of the Skoda branded service center.
6. Place the block on a workbench, with the crankcase facing down, and using a steel ruler and a blade-type feeler gauge, check the flatness of its mating surfaces. If the test results exceed the specified Specifications acceptable value, block can be subjected to turning (for petrol engines only) or replaced. On diesel engines, it is not possible to perform block boring.
7. Before assembling the engine, the cylinders should be honed.
8. Lightly lubricate the cylinder bores with clean engine oil to prevent corrosion. Wrap the block in a plastic bag and store it in a safe place until assembly begins.