
General information
Depending on the model configuration, an auxiliary belt is used to drive attachments such as a generator, water pump and air conditioning compressor from the crankshaft pulley.
On A/C equipped models, the multirib belt is equipped with an automatic tension adjustment device. On other models, the belt tension is adjusted by moving the generator.
When installing a belt, its tension must be properly adjusted in order to guarantee the correct functioning of the auxiliary units, as well as to extend the life of the belt itself.
Removing
1. Park the vehicle on a level, hard surface if possible, apply the parking brake and chock the rear wheels. Loosen the right front wheel nuts.
2. Jack up the front of the car and place it on jack stands. Remove the right front wheel.
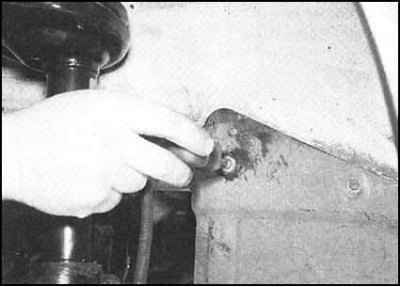
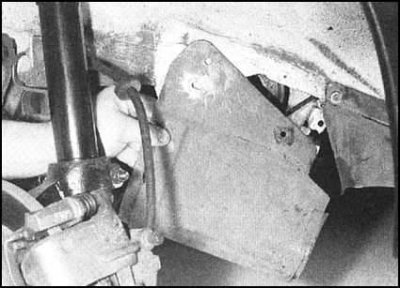
3. Turn out fixing screws and remove a cover of an auxiliary driving belt.
 |  |
Models without air conditioning
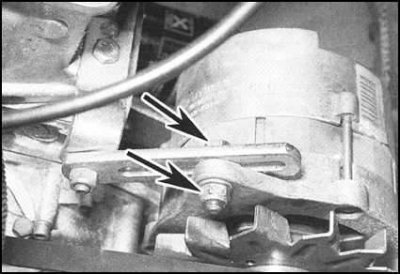
Loosen the upper and lower alternator mounting bolts one or two turns, slide the alternator back and remove the loose belt.
Models with air conditioning
Using a wrench, turn the belt tensioner by the central nut, overcoming the resistance of the spring.
All models
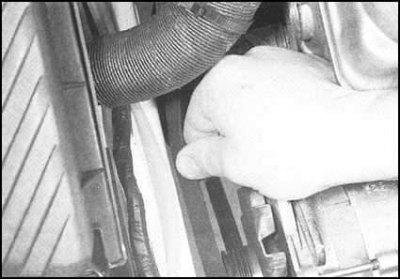
Remove the belt from the alternator pulley, then from the remaining pulleys. Try to remember the direction of rotation of the belt.
Belt installation and tension adjustment
Attention! When installing the belt, be guided by the marks of the direction of its rotation.
Models without air conditioning
1. Place the belt over all provided pulleys. Make sure that the ribs of the belt fall into the return streams of the pulleys.
2. Loosen the top (adjusting bar) and bottom mounting of the generator. Hand-tighten the nut and bolt of the adjusting bar, while maintaining the freedom of movement of the unit.
3. Pull the alternator forward along the car, thereby choosing the slack in the belt.
Note. If necessary, a strong wooden lever can be used to move the generator in the required direction.
4. The belt tension can be considered correct when its deflection with firm pressure with the thumb in the area in the middle between the generator and water pump pulleys is 10 ÷ 15 mm.

5. When you have finished adjusting the belt tension, tighten the upper (adjusting bar), then the lower fastener of the generator.
Models with air conditioning
Scheme of laying the drive belt of auxiliary units on models equipped with A/C
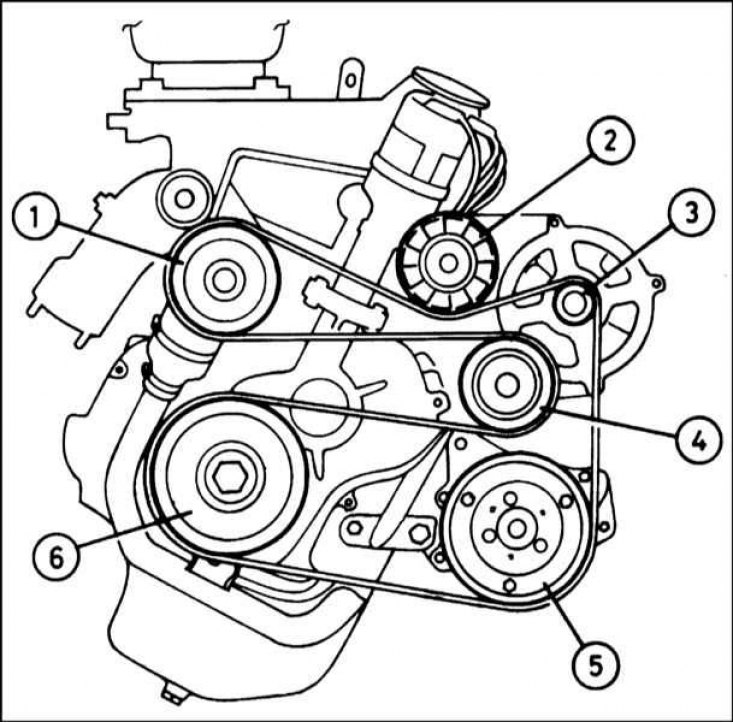
1 - Water pump; 2 - Intermediate roller; 3 - Generator; 4 - Tensioner; 5 - A/C compressor pump; 6 - Crankshaft
1. Put the belt on the pulleys of the crankshaft and air conditioning compressor pump. Make sure that the ribs of the belt fall into the return streams of the pulleys.
2. Using an open-end wrench, turn the belt tensioner by the central nut, overcoming the resistance of the spring.
3. Get the belt under the tensioner roller, then put it on the other pulleys, making sure that the ribs fit correctly in the streams.
4. When the tensioner is released, the belt will automatically tension.
All models
1. Replace the accessory belt cover. Tighten the fixing screws firmly.
2. Install the right front wheel, and lower the vehicle to the ground. Tighten the wheel nuts to the required torque.