



Contents: Removal ⬇ Installation ⬇
Note: Before you begin, please refer to the Note given at the beginning Chapters 9 and the Warning given at the beginning Chapters 13 (regarding asbestos dust).
Removal
1. Jack up the front of the vehicle, securely place it on axle stands, then remove the wheel.
2. Minimize fluid loss by removing the master cylinder reservoir cap and re-tightening it with a piece of polyethylene placed under the cap (do not damage the level sensor). This will create a tight seal and prevent any spillage. Alternatively, clamp the hose using a clamp, vice grip or similar tool.
3. Clean the surrounding area, then loosen the hose coupling.
4. Unscrew the two bolts securing the caliper bracket to the steering knuckle (see photo).
Article reprinted from the website: www.SKODABOOK.ru
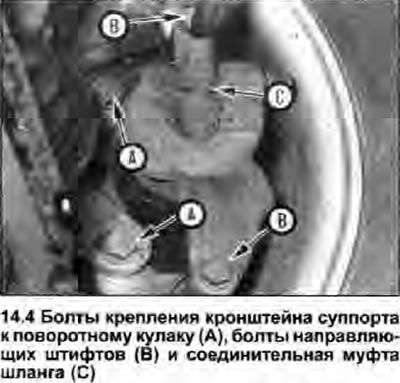
5. Remove the brake caliper assembly and push in a clean wooden spacer (the same thickness as the brake disc) between the brake pads to secure them.
6. Unscrew the caliper from the hose coupling. If a sealing washer is used at this joint, discard it - these washers must be replaced after each removal. If the caliper will not be disassembled, plug its opening to prevent dirt from entering; also seal the hose coupling (or wrap it tightly in plastic).
Installation
7. Install in the reverse order of removal, paying attention to the following:
- a) Tighten all nuts and bolts to the specified tightening torque Specifications.
- b) If equipped, be sure to replace the hose coupling sealing washer.
- c) Ensure that the hose is securely clamped to the caliper and that it is routed correctly, not kinked and secured with a clamp.
- d) Bleed the system (see Chapter 9). Check the component joints for leaks.