



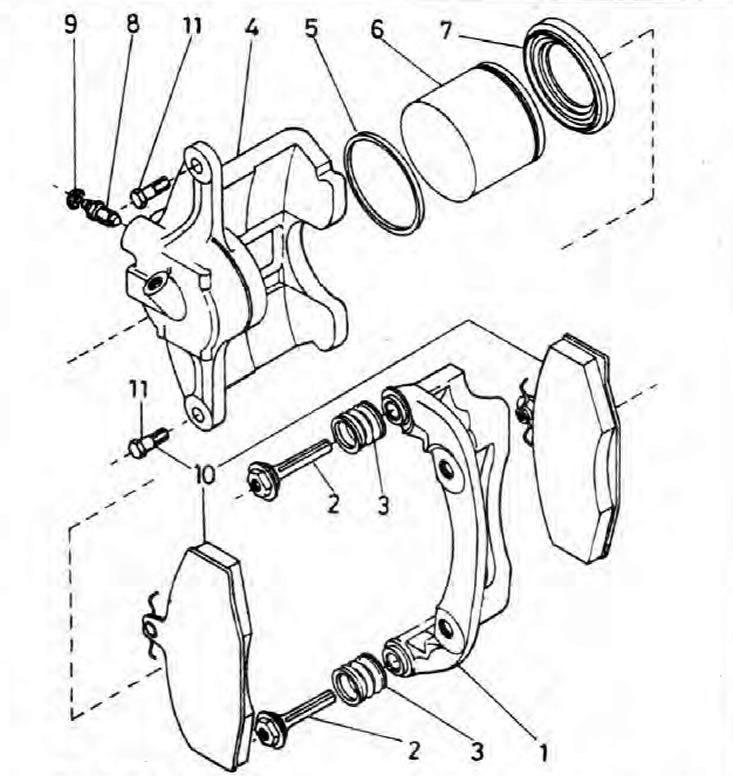
Fig. 9.10. Front brake caliper components
1. Mounting bracket; 2. Guide pin; 3. Rubber dust seal; 4. Support; 5. Piston seal; 6. Piston; 7. Piston dust seal; 8. Bleed nipple; 9. Dust cap; 10. Brake shoe; 11. Guide pin bolt.
Warning: Brake pad sets on coaxial wheels should be replaced at the same time - never replace pads on just one wheel as this will result in uneven braking. Please note that dust generated by pad wear may contain asbestos, which is harmful to health. Never blow off dust with compressed air and try not to inhale it. DO NOT use petrol-based solvents to clean brake components. Use only a special cleaner or methylated spirits.
1. Jack up the front of the vehicle and support it securely on axle stands, then remove the wheel.
2. If the check described in Section 1, showed that the condition of the brake pads is unsatisfactory, remove them and check them more carefully as follows.
3. Move the caliper outward to retract the piston completely into the cylinder, then check that the caliper slides smoothly in the mounting bracket. If it does not, the guide pins should be cleaned, inspected for signs of wear, and lubricated before reassembly.
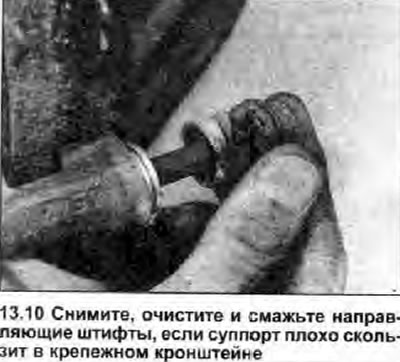
4. Remove the lower caliper guide pin bolt, using a thin open-ended wrench if necessary to lock the head of the guide pin itself (see photo). Rotate the caliper upward to gain access to the brake pads. Do not press the brake pedal until the caliper is in the operating position.

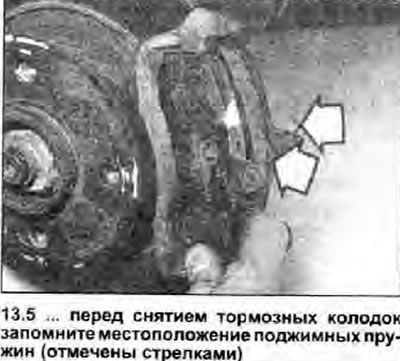
5. Having marked the exact location of the pressure spring on each brake shoe, remove the shoes (see photo). Mark them so that later each one can be installed in its original place. Do not try to swap the shoes to compensate for uneven wear - this will lead to uneven braking.
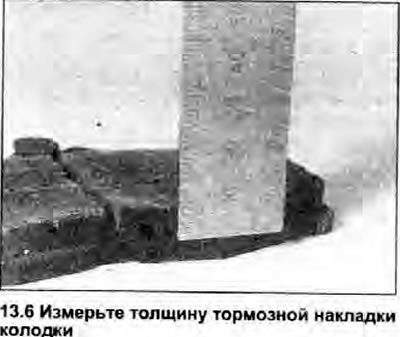
6. First, measure the thickness of the brake lining remaining on each brake pad (see photo). Note that on genuine Skoda brake pads, the central groove of the lining serves as an indicator of its wear limit: if the brake lining of the pad is worn so that the groove is worn at any point, both pads must be replaced.
7. If any of the pads are worn at any point to the specified Specifications minimum thickness. all four front brake pads must be replaced (see warning above). In addition, the pads should be replaced if at least one of them is contaminated with oil or grease; because it is impossible to clean the linings from them.
8. If any of the brake pads show signs of uneven wear or are contaminated with oil or grease, find and correct the cause before proceeding with assembly.
9. If the brake pads are still serviceable, carefully clean them with a clean, soft wire brush or similar tool, paying particular attention to the sides and back of the metal backing. Clean the groove in the brake pad lining and pick out any large debris from the friction material. Carefully clean the brake pad pressure springs and the inside surfaces of the caliper and mounting bracket.
10. If there is any doubt about the sliding of the caliper in the mounting bracket, disassemble it and then clean and lubricate the guide pins as described in Chapter 15 (see photo). Check the condition of the brake disc (see Chapter 16).
11. When assembling, apply a small amount of high temperature brake grease or anti-lock compound (eg Holts Copaslip) on the sides and back of the metal base of each pad and on those surfaces of the caliper and mounting bracket that come into contact with the pads. Do not allow grease to come into contact with the brake linings.
12. Install the brake pads with the friction linings facing the disc.
13. If new pads are being installed, push the caliper piston all the way into the cylinder to create enough room for them. Use either a clamp or similar tool or suitable wooden blocks for this (as levers). Provided that the master cylinder reservoir is not overfilled with brake fluid, it should not overflow, however, just in case, watch the fluid level while you are pushing the piston down. If the fluid level rises above the "Max" line, pump out the excess or drain it through a plastic tube attached to the bleed nipple (see paragraph 1 of Chapter 11).
14. Move the caliper down onto the brake pads and fit the lower guide pin bolt. Skoda recommends replacing these bolts each time they are removed, as they are coated with a locking compound which then loses its effectiveness. For this reason, Skoda's original brake pad kits are supplied with new bolts. If new bolts are not available, carefully clean the bolt threads with a wire brush and apply a drop or two of locking compound to the bolt just before fitting. Tighten the bolt to the specified tightening torque Specifications.
15. Make sure the caliper slides smoothly in the mounting bracket, then press the brake pedal several times to ensure the pads are pressed firmly against the brake disc and normal pedal travel is restored. Install the wheel.
Data taken from this portal: skodabook
16. Repeat this procedure on the opposite brake caliper, then lower the vehicle to the ground and tighten the wheel bolts to the specified torque Specifications (see Section 1 Specifications).
17. Check the brake fluid level (see Section 1).
18. Keep in mind that new pads need to be bedded in, so the car will need to travel several hundred kilometers before maximum braking efficiency is achieved. Avoid hard braking during this period as much as possible and be prepared for longer stopping distances.