



Attention! Remember that brake shoes are subject to replacement only as a set and simultaneously on both wheels of the axle - replacing the pads of only one of the brake mechanisms leads to a violation of the uniformity of the gripping force and loss of directional stability of the car during braking.
Remember that dust generated during wear of the friction material of the pads may contain asbestos, which is harmful to health - do not blow it off with compressed air or inhale it under any circumstances. When servicing the brake mechanisms, wear a protective mask or respirator. Do not use petroleum-based solvents to wash off brake dust - wipe the brake components only with methyl alcohol or a special cleaner.
1. Remove the brake drum (see section Removal, condition check and installation of rear wheel brake drums).
2. Slowly and with all necessary precautions, clean the drum, shield and shoes of the brake mechanism from brake dust.
3. Measure the remaining thickness of the friction linings of the shoes at several points. If at least one of the shoes is worn below the permissible limit, they should be replaced as a set (on both wheels). The shoes must also be replaced if traces of oil, grease or brake fluid are found on them.
4. If you notice signs of uneven wear on the friction linings or traces of oil/brake fluid on them, before you begin assembling the mechanism, determine the source of the leak/cause of the shoe activation and correct the problem.
5. The procedure for replacing the brake shoes is described in the following paragraphs. If no defects are found, reinstall the brake drum (see section Removal, condition check and installation of rear wheel brake drums).
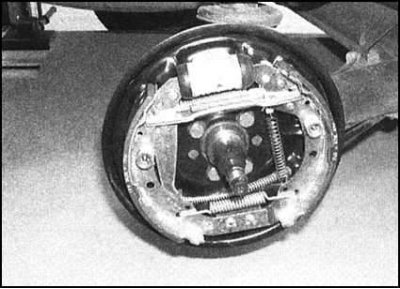
6. Mark the position of the components in the brake drum, paying particular attention to the order of the placement of the adjuster wedge, the expansion bar and any springs.
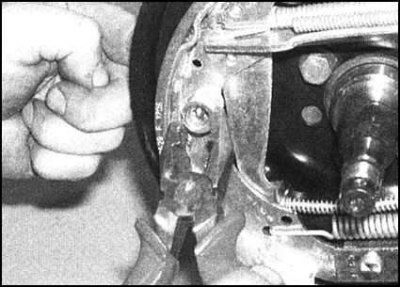
7. Remove the shoe guide spring cups by pressing them down with pliers and turning them 90°...
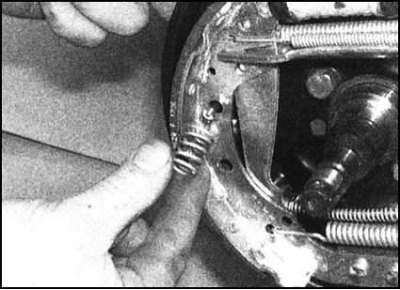
...after removing the cups, remove the springs and anchor pins
8. With the shoes removed from their lower axles one at a time, release the tension on the lower tension spring, then unhook it from both shoe assemblies.
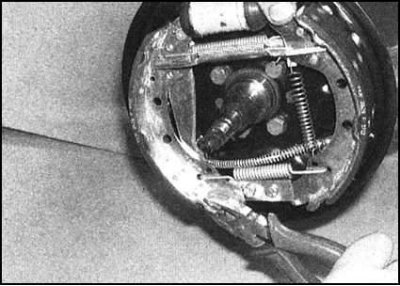
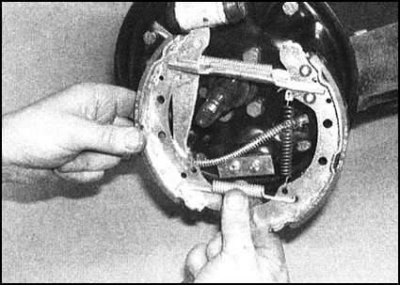
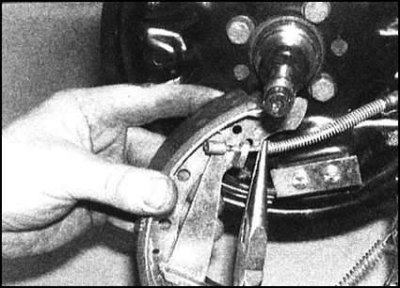
9. Release the upper ends of the shoes from the wheel cylinder pistons - try not to damage the piston seals. Disconnect the parking brake drive cable from the rear shoe. The shoe assembly can now be removed from the brake shield complete with the expansion bar.
Note: Do not depress the foot brake pedal until the shoes are in place. To secure the pistons, wrap the outside of the wheel cylinder assembly with elastic bandage tape.
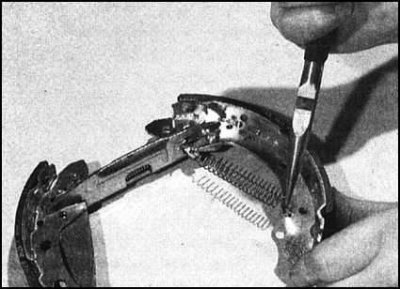
10. Try to remember the installation position of all components, then disconnect the spring from the expansion wedge of the expansion bar and remove it from the shoe assembly.
11. Disconnect the upper tension spring and, releasing it from the expansion bar, remove the rear shoe.
12. Remove the expansion wedge (try to remember its installation position), then remove the release bar and unhook the tension spring.
13. Check all components for signs of wear and mechanical damage. Replace defective parts. Both tension springs must be replaced, regardless of their condition. Although friction linings can, in principle, be purchased individually, the authors of this Manual recommend replacing worn shoes as a set.
14. Unscrew the rubber boots and inspect the wheel cylinder for signs of leaks and mechanical damage. Assess the freedom of movement of both pistons. Information on overhauling wheel cylinders is provided in Section Removal, major repair and installation of front wheel brake calipers.
15. Lightly lubricate the contact surfaces of the release plate and the parking brake actuator lever with special brake grease.
16. Attach the tension spring to the front shoe. Hook the opposite end of the spring onto the expansion bar, which is then inserted into the mounting groove of the front shoe.
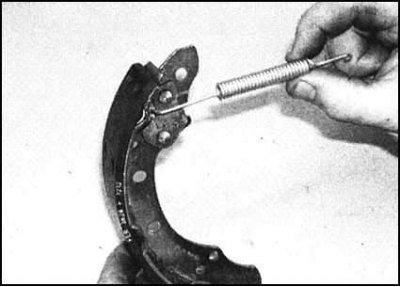
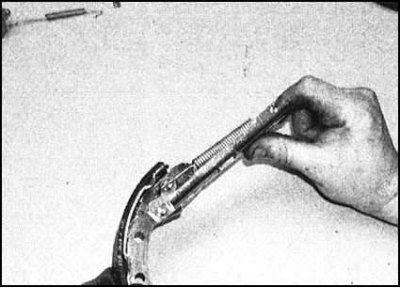
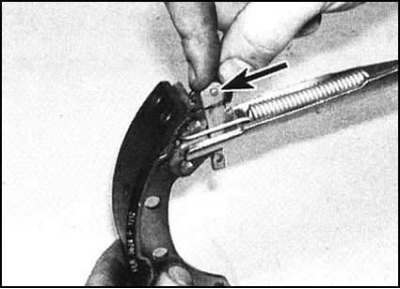
17. Insert the spacer wedge into its regular place between the front shoe and the adjuster pusher. Make sure the components are installed correctly.
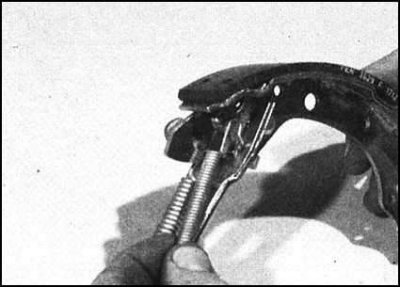
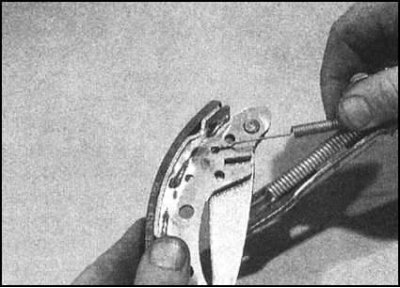
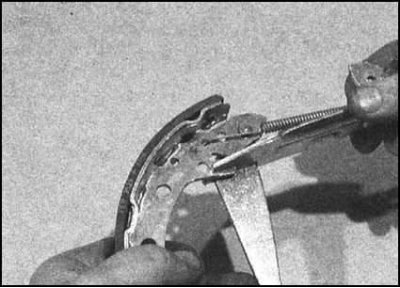
18. Attach the upper tension spring to the front shoe. Hook the other end of the spring into the hole in the rear shoe, making sure that the spring hooks are seated correctly, and insert the rear shoe into the fork of the expansion bar. Make sure that both shoes and the parking brake actuator are correctly engaged with the bar.
 |
 |
19. Install the spring between the adjuster wedge and the front shoe.
20. Before installing the shoe assembly, thoroughly wipe the surface of the brake shield and lightly lubricate all surfaces in contact with the shoes with high-temperature brake grease or anti-seize sealant, paying special attention to the wheel cylinder pistons and the lower axial shoe mounting units. Do not allow grease to get on the surfaces of the friction linings and the working walls of the drum.
21. Remove the elastic bandage from the wheel cylinder and place the shoe assembly in its regular place.
22. Connect the drive cable to the parking brake actuator lever, then insert the upper ends of the shoes into the grooves in the ends of the wheel cylinder pistons.
23. Attach the lower tension spring to the shoes, then place the lower parts of the shoes onto the lower anchor assemblies.
24. Tap the shoes to seat them on the brake shield, then install the anchor pins and guide springs, securing the latter with cups.
25. Install the brake drum in place (see section Removal, condition check and installation of rear wheel brake drums).
26. Repeat the procedure for the second brake mechanism.
27. After replacing the entire set of shoes, completely release the parking brake and adjust the working clearance between the surfaces of the friction linings of the shoes and the working wall of the drum. Adjustment is made by pressing the foot brake pedal until the pressure in the system is fully restored.
28. Check the proper functioning of the parking brake, if necessary, make the appropriate adjustment of its drive (see section Adjusting the parking brake).
29. Finally, check the brake fluid level in the brake master cylinder reservoir.
Attention! Full braking efficiency is achieved only after the new brake shoes have been completely run in. Avoid abrupt braking during the first hundreds of kilometers after replacing brake components.