
Note. See warning at the beginning of Section Replacing the pads of the disc brake mechanisms of the front wheels.
Removing
1. Loosen the rear wheel bolts, support the front wheels with wedges. Jack up the back of the car and place it on jack stands. Remove wheels. Fully release the parking brake.
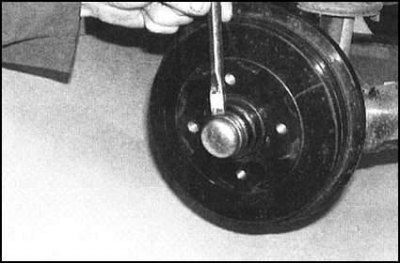
2. Using a hammer and a large flat-bladed screwdriver, carefully remove the protective cover from the center of the brake drum.
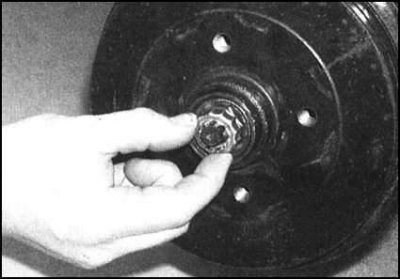
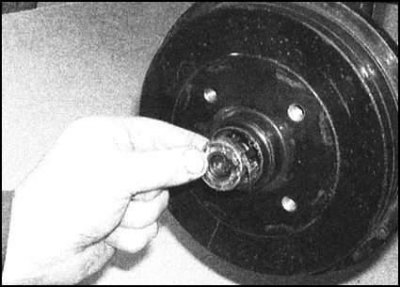
3. Remove the cotter pin, give the hub nut and remove the lock cap.
Note. When assembling, the cotter pin must be replaced without fail.
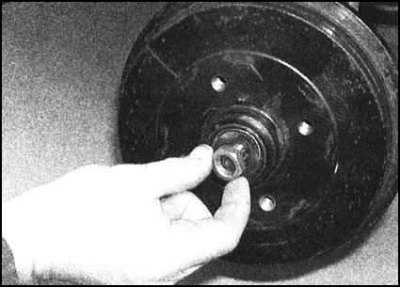
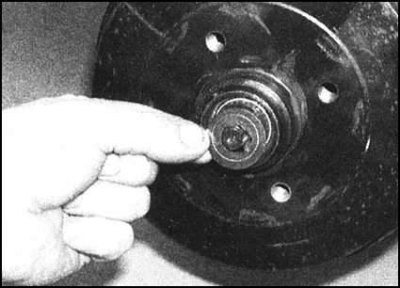
4. Loosen the hub nut, then remove the toothed washer and remove the outer wheel bearing from the center of the drum assembly.
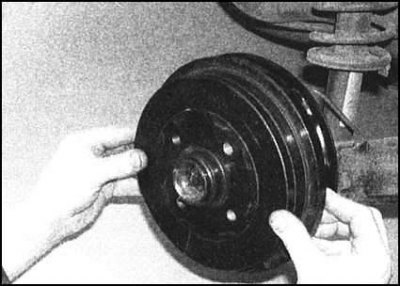
5. The drum should now be removed from the hub by hand. The drum may not be removable either due to an excessively tight fit of the wheel bearing, or due to "sticking" to its working surface of the brake shoes. If it's a bearing, tap the drum around the perimeter with a soft-faced hammer, or use a universal puller, securing it with wheel bolts. If "stuck" shoes, proceed as described below.
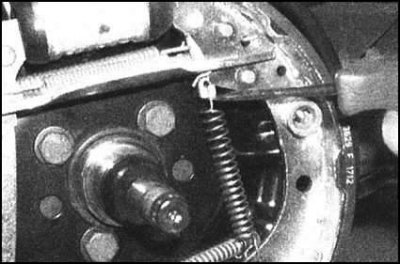
6. Fully release the parking brake adjuster (see Section Parking brake adjustment), providing maximum slack to the drive cable.
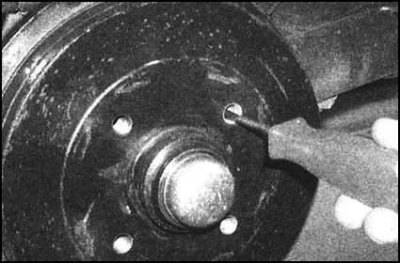
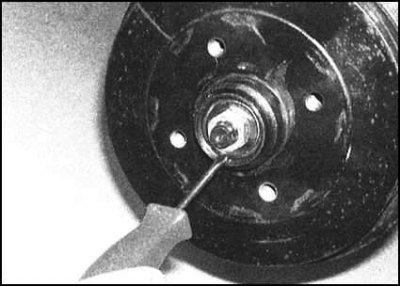
7. Pass a screwdriver through one of the holes for the wheel bolts in the drum...
...and pry the spacer wedge with it, ensuring that the shoes are removed from the drum as completely as possible. Now no drum should come off the hub without any problems.
Examination
Note. Drums are always replaced in pairs for both brake mechanisms of a given axle in order to avoid loss of vehicle directional stability when braking.
1. Use a brush to remove brake dust from the surface of the drum - in no case inhale it!
2. Thoroughly wipe the outside of the drum and inspect it for signs of wear and type damage. Make sure there are no cracks around the bolt holes. A defective drum must be replaced.
3. Check the status of the working (internal) drum surface. In case of detection of deep scratches, scuffs, cavities or furrows machined along the width of the shoes, the drum must be replaced. The presence of light scratches should not cause concern. Use fine-grained sandpaper to remove rust and consolidated dust from the outer edge of the working surface of the drum.
4. Measure the inner diameter of the drum in two mutually perpendicular planes. By comparing the results of two measurements, evaluate the degree of ovality of the drum. It is allowed to groove the drum within acceptable limits. If this is not possible, the defective drum must be replaced in tandem with the opposite one.
Note. Grooving must also be done for both drums at the same time and by the same amount.
Installation
1. Before installing a new drum, remove all traces of preservative from the drum with solvent. If necessary, reinstall the inner wheel bearing components, thoroughly packing the latter with grease.
2. Before installing the drum, fully reduce the brake shoes, for which lift the expansion wedge of the regulator.
3. Lubricate the drum oil seal and carefully seat the assembly on the axle trunnion.
4. Install the outer wheel bearing and thrust washer. Make sure that the teeth of the washer engage with the groove in the bridge trunnion.
5. Screw on the hub nut and tighten just enough so that it is pressed against the washer while turning the drum to shrink the wheel bearings. Gradually loosen the nut, allowing the toothed washer to be moved slightly with the screwdriver. Note: The puck should move with very little resistance. Once the hub nut is in the correct position, replace the retaining cap and install a new cotter pin.
6. Install the protective cover on the center of the drum, seating it as far as it will go.
7. Repeat the procedure for the second drum, if necessary, adjust the parking brake actuator.
8. With both drums in place, adjust the fit of the shoes by firmly depressing the foot brake pedal several times until the pressure in the system is fully restored.
9. Finally, reinstall the wheel, lower the vehicle to the ground and tighten the wheel bolts to the correct torque.