
Attention! Remember that the brake pads must be replaced only as a set and simultaneously on both wheels of one axle - replacing only one of the brake mechanisms is fraught with a violation of the uniformity of the gripping force and loss of vehicle directional stability during braking.
Do not forget that the dust generated during the wear of the friction material of the pads may contain asbestos, which is harmful to health - in no case blow it off with compressed air or inhale it. When servicing brake mechanisms, wear a protective mask or respirator. Do not use petroleum-based solvents to remove brake dust - wipe brake components only with methanol or a special cleaner.
1. Chock the rear wheels of the vehicle, apply the parking brake, then jack up the front of the vehicle and place it on jack stands. Remove the front wheels.
2. Pulling the caliper outward, sink it into the piston in the cylinder.
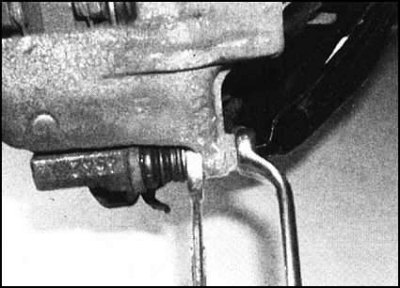
3. Turn out a bolt of the bottom directing finger of a support. While loosening the bolt, keep your finger from turning with an open end wrench.
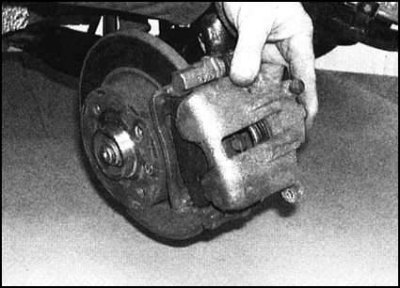
4. Turning the caliper up, remove it from the shoes and anchor bracket of the brake mechanism and tie it with wire to the suspension elements.
Note. Never overstretch the flexible brake hose.
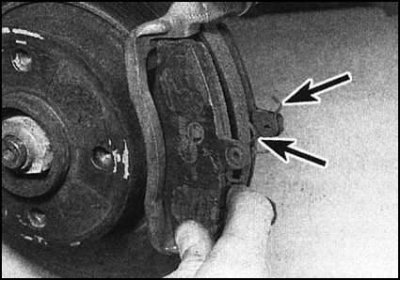
5. Remove the two pads from the anchor bracket of the brake mechanism.
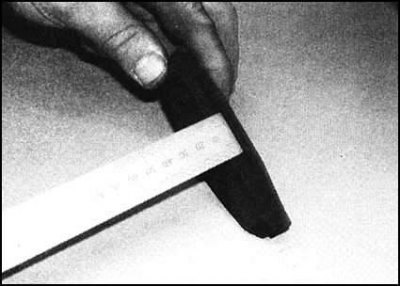
6. Measure the residual thickness of the friction lining of each shoe. If any of the pads at any point is worn more than the allowable limit, all four pads (from both brake mechanisms of a given vehicle axle) are to be replaced. The pads should also be replaced if they are oiled or clogged. The cause of oil getting into the brake mechanism should first be identified and eliminated. If there are signs of uneven pad wear, you should also try to determine and eliminate the cause of the defect.
7. If the condition of the pads is found to be satisfactory, they should be carefully cleaned with a metal brush, paying special attention to the quality of cleaning the rear walls of the metal substrates. Do not forget to clean the grooves made in the body of the friction linings, completely removing debris and stuck small foreign objects from them. When finished with the pads, clean the contact surfaces of their fit in the caliper and anchor bracket.
8. Before installing the pads, check the fit of the caliper guide fingers, then evaluate the condition of the protective covers of the fingers. Remove dust and dirt from caliper and piston surfaces. Assess the condition of the piston boot. Check the piston itself for signs of leakage, corrosion and mechanical damage. If defects are found, the components must be replaced (see Section Removal, overhaul and installation of front wheel brake calipers).
9. When installing new (and therefore thicker) pads, the caliper piston must be recessed in its cylinder in order to ensure sufficient free space. Use a clamp or a suitable piece of wood (as a lever). If the GTZ was not overfilled, pushing the piston should not cause the brake fluid to overflow over the edge of the reservoir, but this moment should be checked. When the liquid level reaches the MAX mark, its excess must be pumped out of the GTZ tank, or released through the hose through the bleed valve.
Warning! In order to avoid poisoning, in no case do not suck the brake fluid out of the cylinder with your mouth - use a syringe or a rubber bulb!
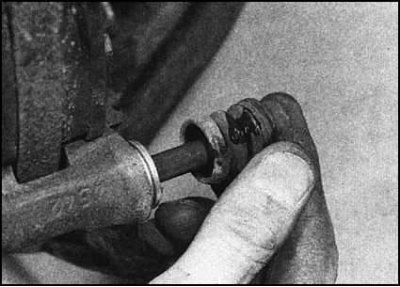
10. Remove all traces of old sealant from the threads of the bolt and guide pin. In case of defects in the thread, the bolt must be replaced.
11. Install the pads in the anchor bracket of the brake mechanism (friction linings to the disc).
12. Lower the caliper, making sure the anti-squeal springs are placed in it correctly.
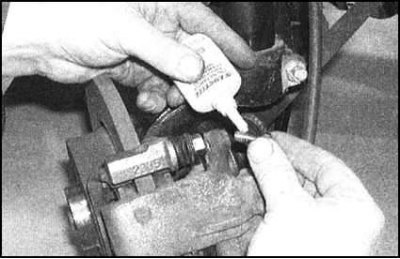
13. Lightly lubricate guide pin bolt threads with Loctite 243.
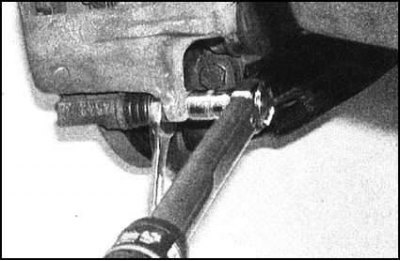
14. Pressing the caliper down, screw in the bolt and tighten it with the required force (keep your finger from turning with an open-end wrench).
15. Depress the foot brake pedal several times to restore pressure in the hydraulic system.
16. Repeat the above procedure for the opposite wheel brake caliper.
17. Replace the wheels, lower the vehicle to the ground and tighten the wheel bolts to the required torque.
18. Check hydraulic fluid level.
Attention! Full braking performance is only achieved after the final running-in of the new brake pads. Avoid sudden braking during the first hundred kilometers after replacing brake components.