
Note. Checking the installation of the injection phases of the high-pressure fuel pump on diesel engines is carried out in a static way. A plunger-type dial meter is required to estimate the amount of pump lift. The phase setting is determined by the distance between the TDC mark on the flywheel and a fixed point on the engine, the measurement of which should be entrusted to qualified car service specialists.
Removing
1. Disconnect the negative cable from the battery.
2. Remove the air cleaner inlet sleeve (see Section Removing and installing the air cleaner assembly and intake tract components).
3. Due to the extremely limited access to the pump, it would be wise to remove the radiator.
4. Acting in accordance with the instructions given in Chapter Engine repair do the following:
- a) Remove the camshaft cover outer timing belt cover;
- b) Bring the engine to the TDC position;
- c) Remove the toothed belt from the camshaft pulleys and injection pump.
5. Now you need to remove the gear from the injection pump shaft. In the process of releasing the fastener, the gear wheel should be blocked from turning with a suitable device, which can easily be made from improvised means (see Section Removal and installation of the timing belt and its covers).
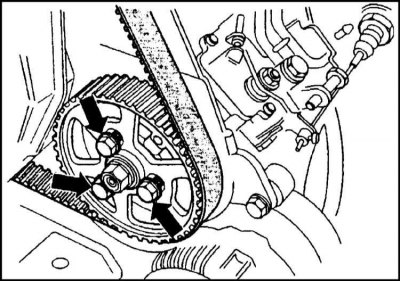
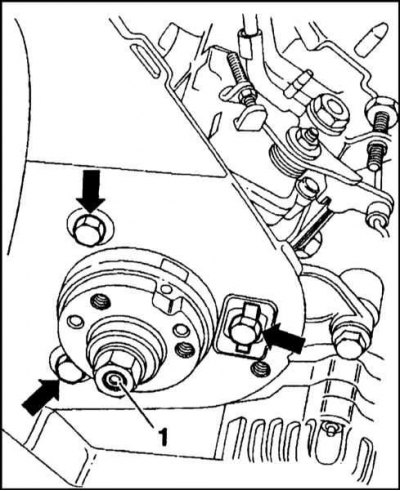
6. Loosen the three mounting bolts and remove the gear wheel from the pump flange.
Attention! Never loosen the central nut of the gear wheel, as this may lead to a violation of the basic settings of the injection phases.
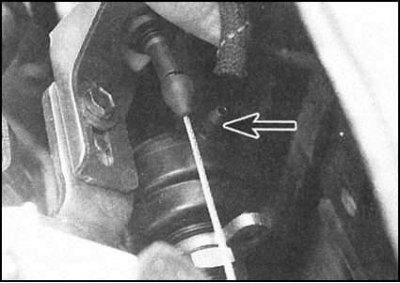
7. Having previously marked, disconnect the fuel supply and return hoses from the pump and also disconnect the control hose from the return fitting.
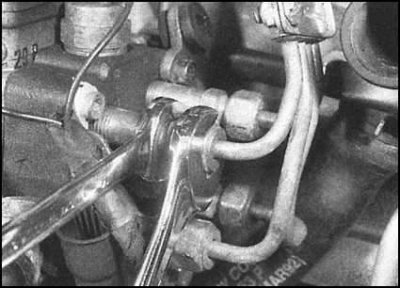
8. Using two wrenches (you may need to use a split wrench with a split head) Loosen the hard fuel pipe fittings at the rear of the injection pump and each of the injectors. Remove the tube assembly from the engine.
Attention! Get ready to collect spilled fuel - place a rag under the distributed fittings. Take care not to deform the rigid fuel pipes under any circumstances.
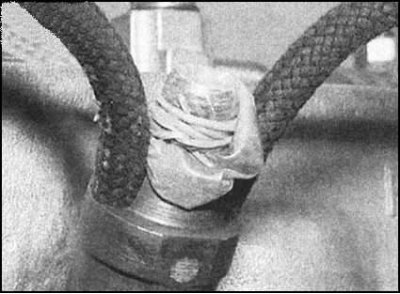
9. Seal the open ends of the fuel pipes and fittings immediately to prevent dirt from entering the fuel system. Use a finger cut off from a rubber glove...
..., or plug the fittings with a hollow bolt unscrewed from it, previously tightly planted in a segment of a hose that is suitable in diameter.
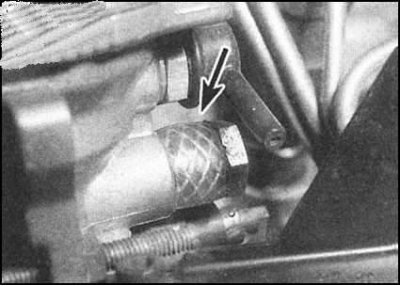
10. Disconnect the vacuum tube from the idle speed booster drive on the injection pump wall.
11. Disconnect the accelerator cable from the injection pump bracket (see Section Removing, installing and adjusting the accelerator cable).
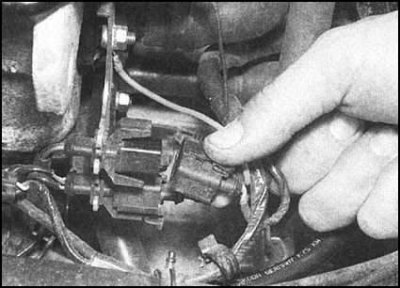
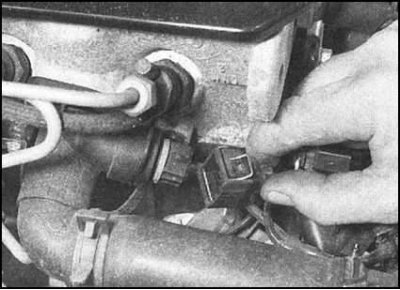
12. Having previously marked, disconnect the electrical wiring from the following components:
- a) Oil pressure switch on the left side of the cylinder head;
- b) Oil temperature/pressure switch on fuel filter support bracket;
- c) Two connectors installed in the bracket on the left wall of the cylinder block;
- d) Coolant temperature sensor on the coolant elbow at the front of the cylinder head.
 |  |
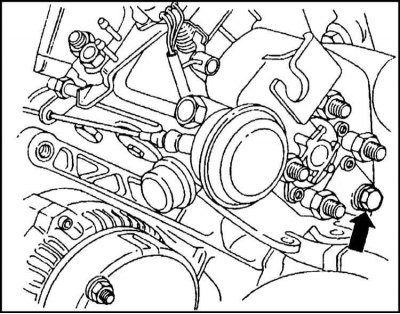
13. Before removing the injection pump, mark the position of the fixing bolts in the oval holes - during assembly, the pump must be installed strictly in the same position in order to avoid violating the basic settings of the injection phases.
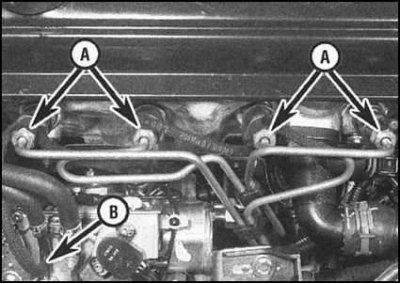
14. Turn out a back fixing bolt and three bolts from the forward party of the pump (see accompanying illustrations). Make sure nothing is left connected to the injection pump and remove the pump from the engine compartment.
 |  |
Installation
1. Install the injection pump in its regular place on the engine, tighten the fasteners with the required force.
Note. The mounting holes of the pump are oval in shape, which allows you to adjust the position of the pump on the engine. When installing a new pump, the bolts should first be installed in the center of the holes in order to obtain the maximum range of adjustment. The old pump is installed strictly in its original position in accordance with the marking applied during the dismantling process.
2. Perform the initial filling of the pump with clean diesel fuel through a funnel, alternately inserted into the fuel supply and return fittings (cover the fittings with rags to collect spilled fuel).
3. Connect the fuel lines to the injectors and pump. Tighten the fittings to the required torque using two wrenches.
4. Connect fuel supply and return pipes to high pressure fuel pump (don't forget to replace the sealing washers). Tighten the hollow bolts of the union connections with the required force.
5. Connect all disconnected wiring according to the markings made during the dismantling process.
6. Connect a vacuum tube to the valve of the device of increase in turns of idling.
7. Connect and adjust the accelerator cable (see Section Crankcase ventilation system - general information).
8. Replace the pump gear and secure it with three bolts - thread the bolts through the oval holes and tighten them until hand-tight.
9. Block the gear wheel from turning by inserting a metal rod through the center hole into the hole in the pump hub. The play of the locked wheel should be minimal.
10. Install the timing belt and adjust its tension (see Section Removing, checking the condition and installing the front cover, timing chain and sprockets).
11. Now it is necessary to check the installation / adjustment of the injection phases of the high-pressure fuel pump in the conditions of a car service workshop. When installing a new injection pump, it is also necessary to connect an anti-theft immobilizer to it.
12. Check up turns of idling, in case of need make corresponding correction. Then check the setting of the maximum engine speed (see Section Exhaust system - general information and component replacement) and fast idle speed (see Section Catalytic converter - general information and precautions).
13. Further assembly is carried out in the reverse order of dismantling.