
Examination
1. In the event of a malfunction of the system, the cause of the failure is searched for by substituting known good components instead of the checked ones, or using special diagnostic equipment in a car service workshop. Some preliminary checks are described in the following paragraphs.
2. Check up a condition of two safety locks of system located in the left back corner of an impellent compartment of the car. One of the fuses is designed for a rated current of 5 A, the second (larger) - 50 A. Knocking out a 50-amp fuse indicates a serious malfunction in the wiring of the circuit - in no case try to simply replace a blown fuse without first identifying and eliminating the cause of the circuit overload - this practice is fraught with fire.
3. Disconnect the electrical wiring from the coolant temperature sensor (CTS), which will cause the preheat system to work in cold engine mode.
Note. turning the ignition on with the CTS disconnected will cause a fault code to be stored in the memory of the preheating system control unit, which can then be cleared by a specialist using diagnostic equipment. You can leave the CTS connected and wait for the engine to cool completely.
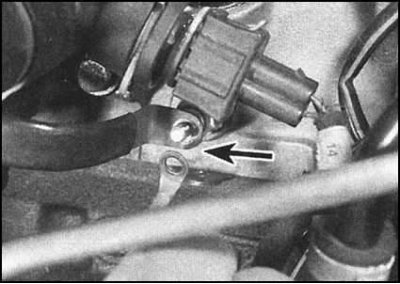
4. Connect a voltmeter or 12-volt test lamp between the power supply wire to the glow plug and a good ground point on the engine block ground.
Attention! Ensure that the power terminal is at a safe distance from ground.
5. Ask an assistant to activate the preheat system (by turning the key to position II, or by opening and closing the driver's door of the car) and check for battery voltage at the glow plug terminal (at the end of the period of operation of the preheating system, the voltage will be switched off automatically).

6. If there is no supply voltage, check the condition of the system relay and the power supply wires to the candles.
7. To find the faulty glow plug, disconnect the negative cable from the battery.
8. Refer to the materials in the next subsection and disconnect the power supply wire from the glow plug terminal. Now measure the electrical resistance between the spark plug terminal and ground. A reading above a few ohms indicates a malfunction of the candle.
9. If you have a suitable ammeter on hand, connect it between the glow plug and the power supply wire to it. Temporarily connect the battery.
10. If possible, start the engine in the normal way and, leaving it idling, take the reading (approximately 50% initial jump in amplitude should be ignored). Compare the measurement result with the requirements of the Specifications. The nominal value for each of the candles is a current of 8 A, so a reading of 32 A indicates the correct operation of all four candles, 24 A - the failure of one of the candles, 16 A - the failure of two sections, etc.
11. Finally, remove the glow plugs and inspect them visually.
Removing
1. If you haven't already, disconnect the negative cable from the battery.
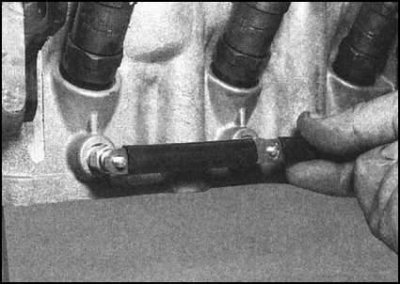
2. Give the nuts, throw off the washers from the terminal rail of the candles. Remove the power bar/wire.
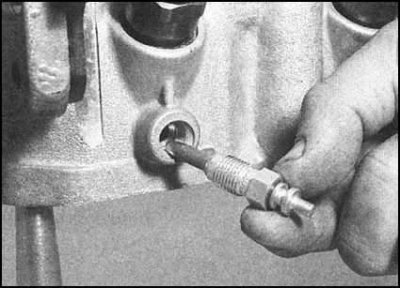
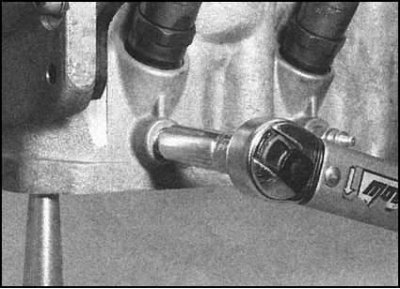
3. Turn out candles.
4. Check the working elements of the candles for signs of damage. Severe dipstick burnout usually indicates a malfunction of the corresponding fuel injection nozzle.
Attention! In no case do not check the correct operation of the spark plugs removed from the engine - a serviceable spark plug heats up very quickly!
Installation
Installation is in the reverse order. The tightening of the candles must be carried out strictly with the required force. Don't forget to connect the wiring to the coolant temperature sensor (CTS).