



Removal the side trim of the instrument panel
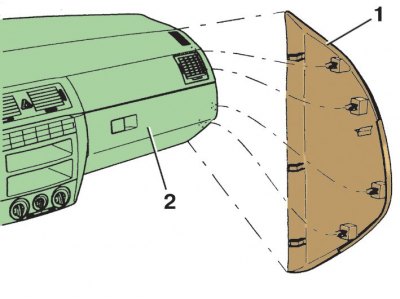
1 – side cladding; 2 – instrument panel
Removal the lower instrument panel trim
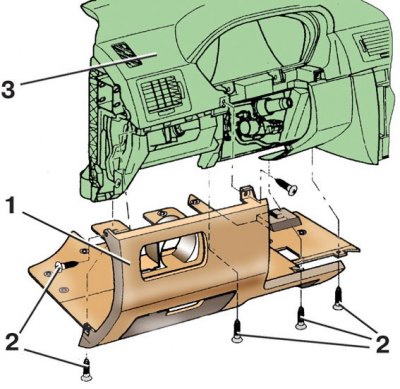
1 – lower cladding; 2 – screws; 3 – instrument panel
Removal the glove compartment
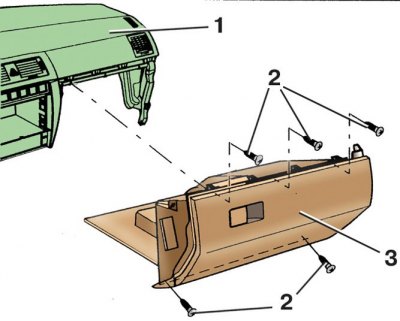
1 – instrument panel; 2 – screws; 3 – glove compartment
Central console of the instrument panel
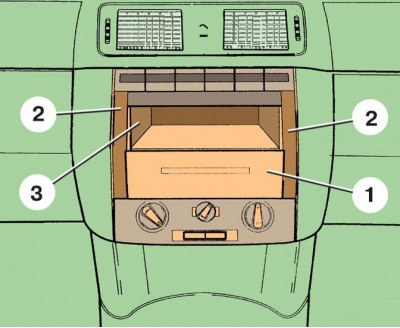
1 – glove compartment; 2 – center console trim; 3 – inner part of the center console
Removal the heater control panel
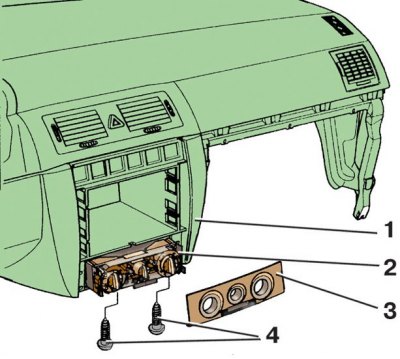
1 – instrument panel; 2 – heater control panel; 3 – panel cladding; 4 – screws
Removal the center console cover
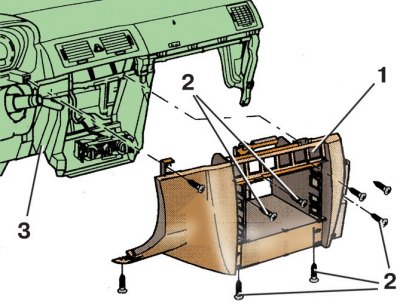
1 – casing; 2 – screws; 3 – instrument panel
Removal the instrument panel amplifier
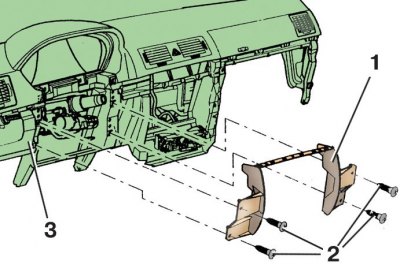
1 – amplifier; 2 – screw; 3 – instrument panel
Removal the instrument panel
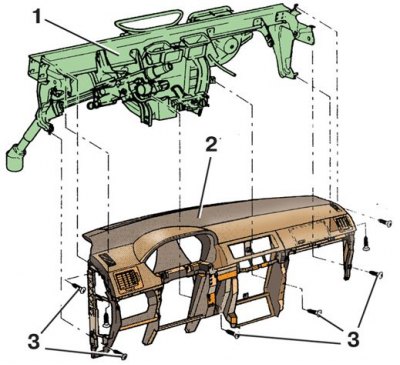
1 – instrument panel bracket; 2 – instrument panel; 3 – screw
(Data Copied from the portal: SKODABOOK.RU)
1. Disconnect the wire from the "-" terminal of the battery.
2. Remove the steering wheel, upper and lower steering column covers, return ring and slip ring (see subsection 8.1, subsection 8.2, subsection 8.3.1).
3. Remove the instrument cluster (see subsection 10.4).
4. Remove the steering column switch (see subsection 10.11).
5. Using a screwdriver, carefully pry up the latches where they are attached and remove the side trims 1 (see figure Removing the side trim of the instrument panel) on both sides of the panel there are 2 instruments.
6. Remove the center switch panel (see subsection 10.11).
7. Remove the fuse box from the instrument panel (see subsection 10.1).
8. Remove the diagnostic connector located in the glove compartment on the driver's side.
9. Unscrew screws 2 (see figure Removing the lower instrument panel trim) fasteners and remove the lower trim 1 of the instrument panel on the driver's side.
10. Unscrew screws 2 (see figure Removing the glove compartment) fasteners and remove the glove compartment 3 from the instrument panel on the passenger side.
11. Remove the radio equipment from the instrument panel.
12.Remove the switches from the instrument panel (see figuresubsection 10.11).
13. Using a screwdriver, carefully pry off the trim 2 (see the figure Central console instrument panel) central console of the instrument panel.
14. Remove storage compartment 1 from the center console.
15. Using a screwdriver, carefully pry up the sides and remove the inner part 3 of the center console.
16. Using a screwdriver, carefully pry off the trim 3 (see figure Removing the heater control panel) heater control panels.
17. Unscrew the two screws 4 securing the heater control panel 2.
18. Remove nine screws 2 (see figure Removing the center console cover) fasteners and remove the cover 1 of the central console of the instrument panel, pushing the heater control panel inward.
19. Remove four screws 2 (see figure Removing the instrument panel amplifier) fasteners and remove the instrument panel amplifier 1.
20. Remove the center nozzles from the instrument panel (see subsection 11.8.1).
21. Remove eight screws 3 (see figure Removing the instrument panel) fasteners and remove the instrument panel 2 from the bracket 1.
22. Install the instrument panel in reverse order.