Note: Please refer to the warning given at the beginning of the Chapter 21.
Removing
1. Jack up the rear of the vehicle, place it securely on axle stands, then remove the wheel.
2. Using chalk or paint, mark the drum and hub with alignment marks.
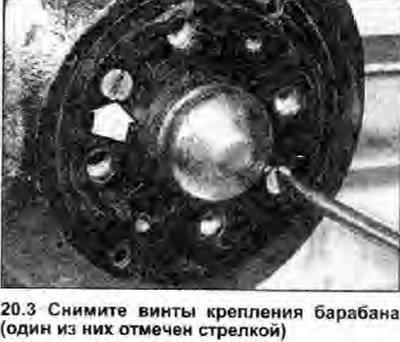
3. Apply the handbrake to prevent the drum from rotating. Loosen the drum fixing screws (see photo). Release the handbrake completely and remove the drum.
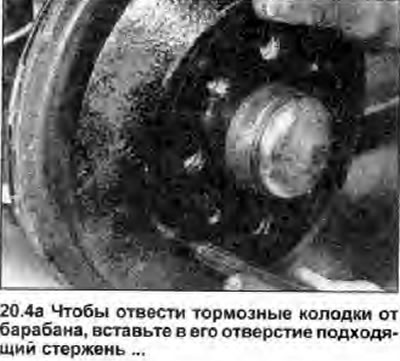
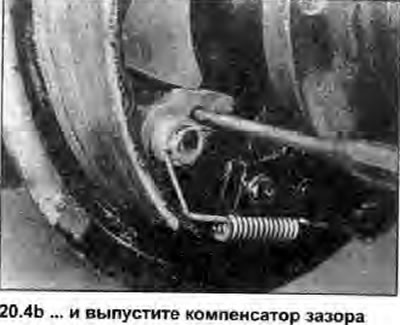
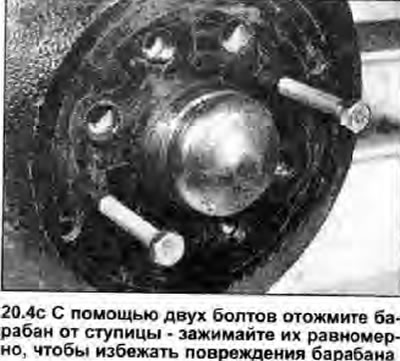
4. If the drum is stuck, first make sure the handbrake is fully released, then insert a suitable rod into one of the holes near the outer edge of the drum and press the toothed segment of the self-adjusting lash adjuster to move the brake shoes away from the drum. If the drum still cannot be removed, it is probably due to corrosion. Either knock the drum off the hub gently with a mallet, or screw it into the holes in the drum (not in the hub!) two bolts with a thread size of 8 mm and tighten them evenly and carefully in order to press the drum from the hub in this way (see photo).
 |  |
 |
Inspection
Note: If one of the drums needs to be replaced. REPLACE BOTH DRUMS to ensure equal and effective braking.
5. Gently (see warning given in Chapter 21) remove all traces of dust from worn pads from the drum.
6. Clean the outside of the drum and inspect it for signs of wear and damage such as cracks around the wheel bolt holes. Replace drum if necessary.
7. Carefully inspect the inside of the drum. Light scratches on its friction surface are perfectly acceptable, but if deep grooves are found, the drum must be replaced. Usually, a protrusion consisting of a mixture of rust and dust forms on the inner edge of the drum. You just need to scrape off such a protrusion, and then clean the surface with a fine (grain size 120-150) sandpaper. If, however, the protrusion is due to wear on the working surface, the drum must be measured as described below. Provided that this does not increase the drum more than specified in Specifications maximum diameter, you can instruct a specialist to regrind the drum (together with the second drum, because they must have the same diameter). This will help repair minor wear or damage; otherwise the drum must be replaced.
8. If there is suspicion, 'the drum is worn excessively or has become oval. measure its inner diameter at several places using an inside gauge, both inside and outside the area covered by the brake pads. Measurements must be taken along axes perpendicular to each other in order to compare them. you could check the drum for ovality. If the drum is worn anywhere before the Specifications maximum, or if its ovality exceeds the maximum allowable value, both drums must be replaced.
Installation
9. Install in the reverse order of removal paying attention to the following:
- A) When installing a new brake drum, use a suitable solvent to remove any protective coating that may have been applied to the inner surface of the drum.
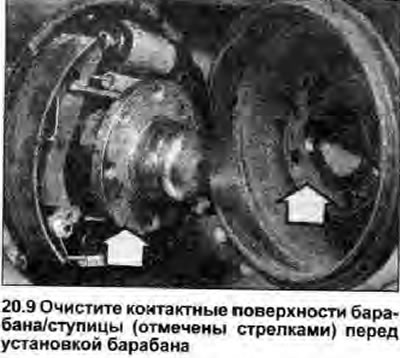
- b) With a clean wire brush, remove all traces of dirt, corrosion, and dust resulting from pad wear from the contact surfaces of the drum and hub (see photo), then apply some anti-blocking compound on them (e.g. Holts Copaslip).
- c) Align the marks made before removal.
- d) Tighten the drum mounting screws and wheel bolts with tightening torque. regulated specifications (see also Specifications Section 1).
- e) Press the brake pedal several times. so that the components of the working brake cylinder and pads are in their working position and normal pedal travel is restored.
- f) Check and correct, if necessary, the handbrake adjustment (see section 1). Make sure that the wheels turn easily - only a very slight rustling of the brake pads against the drum is acceptable.