
Warning: The voltages produced by a non-contact ignition system are significantly higher than those produced by a conventional system. Be extremely careful when working on a system with the ignition on. People with implanted cardiac pacemakers should not touch the circuits of the ignition system, its components and test equipment.
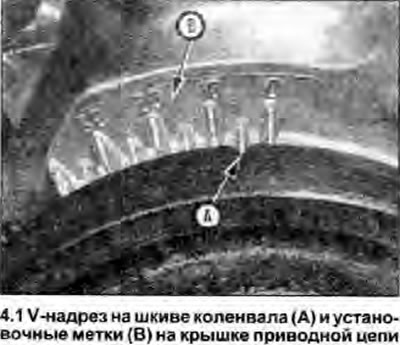
1. Before checking the ignition timing, clean the timing marks. On the crankshaft pulley, the alignment mark is marked with a V-notch on the inside. On the cover of the drive chain, the alignment marks are marked with graduated strokes (photo). With white paint, mark the V-notch on the pulley and the corresponding line on the drive chain cover (correct injection timing, see Specifications).
2. Start the engine and allow it to warm up to normal operating temperature, making sure the idle speed is correct, then turn off the engine and connect the strobe according to the manufacturer's instructions. Disconnect the vacuum tube from the distributor, plug it temporarily.
3. Start the engine and aim the stroboscope at the alignment marks: the marks highlighted in paint should be clearly visible and appear to be stationary. Make sure that the mark on the pulley is aligned with the correct mark on the drive chain cover, or its deviation is within the allowable limits.
4. If adjustment is needed, loosen the distributor adjustment bolt, then turn the body until the alignment marks line up. Tighten the bolt and check the ignition timing again.
5. If we now increase the engine speed, as a result of the automatic advance mechanism, the mark on the pulley will begin to move away from the mark on the drive chain cover; if this is not the case, check the operation of the mechanism.
6. Connect the vacuum tube; the ignition timing will change slightly. If the angle does not change, the distributor vacuum block may be defective.
7. When the adjustment is completed, turn off the engine and disconnect the stroboscope.