



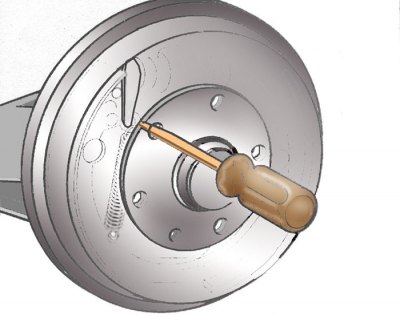
Brake pad alignment
Installing the rear wheel drum brake mechanism
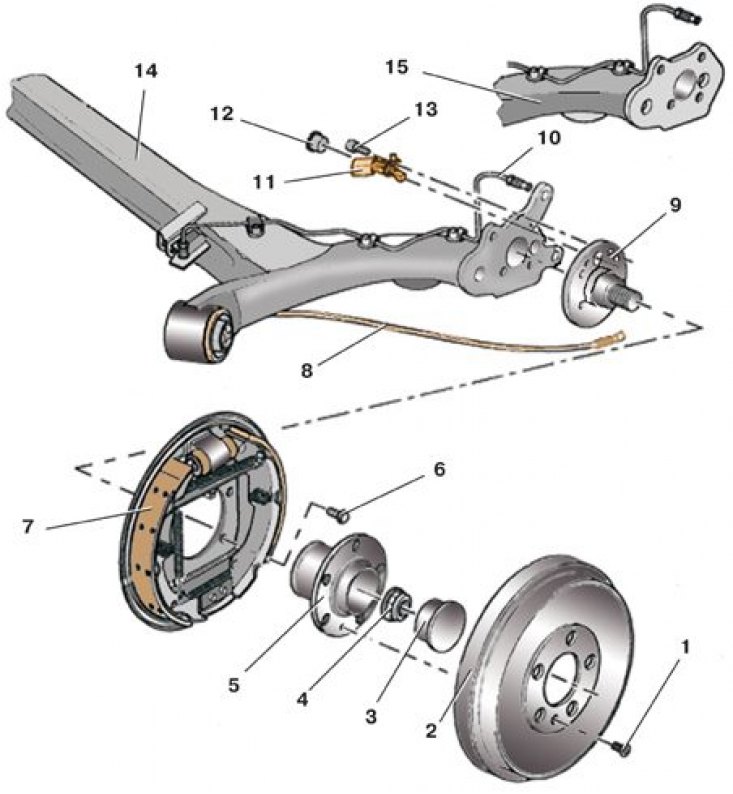
1 – screw; 2 – brake drum; 3 – protective cap; 4 – hub nut; 5 – hub; 6 – brake shield mounting bolt; 7 – brake shield assembled with the brake mechanism; 8 – parking brake cable; 9 – axle journal; 10 – brake pipe; 11 – wheel speed sensor; 12 – plug (on models without ABS); 13 – sensor mounting bolt; 14 – rear suspension beam; 15 – rear suspension beam (version of execution)
A defective brake drum reduces the life of the brake pads and leads to ineffective and uneven braking.
1. Replace the brake drum if its inner diameter has reached the maximum permissible value.
2. If deep scratches, chips or ovality appear on the working surface of the drum, the drum must also be replaced.
3. Remove the wheel after loosening its mounting bolts on the vehicle while it is on the ground.
4. Make sure the parking brake lever is fully depressed (the parking brake is released).
5. Bring the brake pads together. To do this, use a screwdriver through the hole for the wheel mounting bolts in the drum (see the figure Brake pads alignment) push the adjusting wedge up (there is a special protrusion on the wedge for this purpose).
6. Loosen screw 1 (see figure Installing the rear wheel drum brake mechanism) fastening the brake drum to the hub.
7. Remove the brake drum 2. If removal is difficult, knock off the disc with a rubber or polymer hammer.
8. Install the new brake drum and secure it with screw 1.
9. Only tighten the wheel bolts fully when the vehicle is on the ground.
10. Press the brake pedal several times to automatically adjust the position of the brake pads.
Inner diameter of brake drum, mm:
- nominal - 200
- maximum allowable - 201
The tightening torque of the brake drum mounting screw is 4 Nm.
This material is published on the portal (SkodaBook)